
Your Custom Text Here

9 Professional Trades High Schools Should Offer
Not every student wants to go to a traditional four-year university after high school, and that’s okay!
High schools should expand their vocational offerings to give students more real-world experience and job training, ensuring they are prepared for skilled jobs in high-demand fields.
In this article, we’ll explore nine professional trades that high schools should offer.

Not every student wants to go to a traditional four-year university after high school, and that’s okay!
Many students are more interested in hands-on work and learning specific skills that can help them start their future careers right away.
For these students, professional trades offer a great alternative to traditional colleges.
Unfortunately, not all high schools provide enough opportunities for students to explore trade school programs.
Vocational schools focus on teaching students how to do specific, in-demand jobs. This type of vocational education gives students practical skills and real-world experience, making it easier for them to get a good job soon after they graduate.
In this article, we’ll explore nine professional trades that high schools should offer.
(1) Electricians
Electrical systems are essential in every home, business, and school.
Electricians are the ones who keep everything running smoothly. They make sure that wiring and other electrical systems are safe and efficient.
According to the Bureau of Labor Statistics (BLS), the demand for electricians is expected to grow by 7% through 2031, making it a great career choice for students looking for skilled jobs.
Why High Schools Should Offer It ELECTRICIAN COURSES
When high schools offer trade programs that teach students how to work with electrical systems, students learn the basics of wiring, safety procedures, and power distribution.
After graduation, they could continue their education with an associate degree or specialized job training.
Best Amazon Products for Electrical Studies




With only two years of training, they can start working as electricians, earning a competitive salary right away.
This career path offers great pay, job security, and the option to enter the workforce without a four-year degree.
(2) HVAC Technicians
When we talk about heating, ventilation, and air conditioning (HVAC), we’re talking about systems that make our homes and buildings comfortable all year round.
HVAC technicians are responsible for installing, repairing, and maintaining these systems.
The BLS projects a 5% growth in job opportunities for HVAC technicians through 2031, making it another excellent trade for students to learn.
Why High Schools Should Offer It HVAC COURSES
High school students would benefit from learning the basics of air conditioning, refrigeration, and heating systems through a specialized program.
This vocational education would give them hands-on experience, helping them decide if they want to continue their studies at a community college or technical school.
Best Amazon Products for HVAC Studies


After completing their education, students can enter a stable, high-paying field without taking on the costs associated with a traditional four-year university.
(3) Medical Assistants
Medical assistants play a key role in healthcare settings, supporting doctors and nurses with important tasks like taking patients’ vital signs, preparing patients for exams, and handling basic lab work.
The healthcare industry is growing rapidly, and the BLS predicts that the demand for medical assistants will grow by 16% through 2031, making it a great field to consider for students interested in healthcare.
Why High Schools Should Offer COURSES FOR MEDICAL ASSISTANTING
By offering programs for medical assistants, high schools can give students the opportunity to gain real-world experience in healthcare settings.
Students could learn skills like administering medication and keeping patient records, preparing them for further training in a vocational program or diploma program.
After graduating from high school, students can complete their certification and start working in clinics or hospitals in a short amount of time, with much lower costs than those required for a traditional college degree.
For example, a high school student who completes a medical assisting program can go on to a career college to become a certified medical assistant.
Within a year or two, they are working in a doctor’s office, making a difference in patients’ lives without the need for years of additional schooling.
(4) Culinary Arts
If you love food and enjoy creating new dishes, then a career in culinary arts could be a perfect fit for you!
Culinary programs teach students how to prepare, cook, and present food in a professional setting.
According to the BLS, the job outlook for chefs and head cooks is expected to grow by 15% through 2031, making it a great time to enter the food industry.
Why High Schools Should Offer CULINARY ARTS CLASSES:
High schools should introduce students to the world of cooking by offering culinary programs where students get to practice their skills in the kitchen.
Best Amazon Products for Culinary Arts Studies

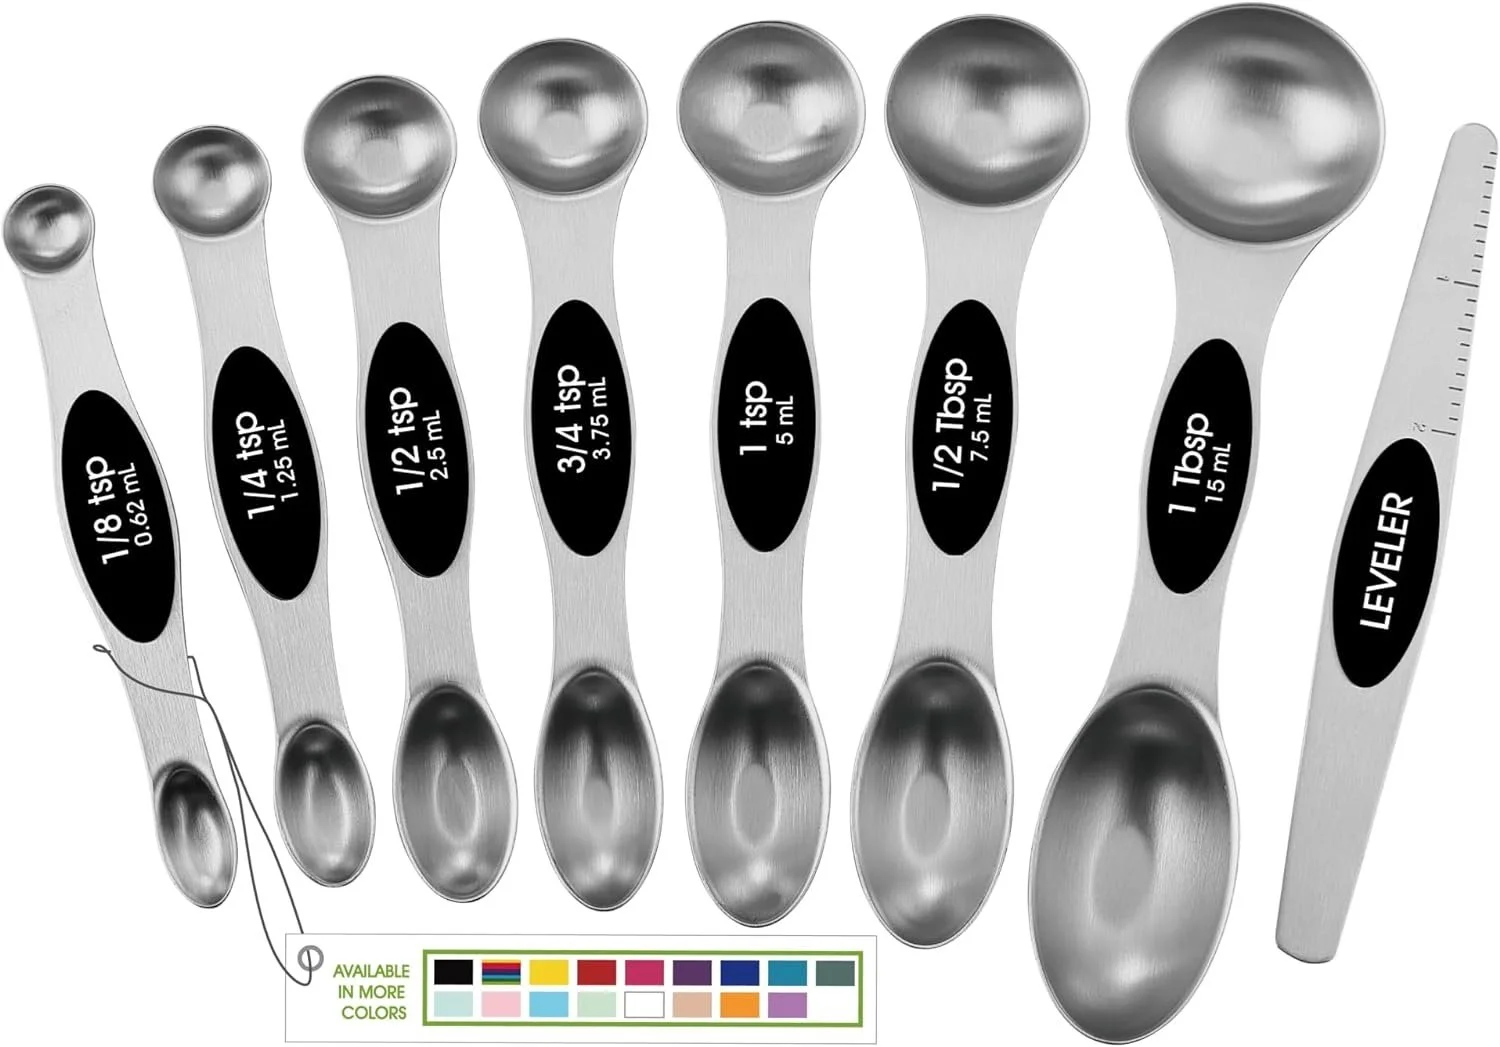


From learning basic knife skills to creating full meals, students can gain hands-on training that prepares them for a career as a chef or restaurant manager.
After graduation, students can continue their education at a culinary institute or even start working in local restaurants to build more experience.
For example, students could discover a love for cooking through a high school culinary program.
After graduation, they could learn advanced techniques in food preparation at a culinary school.
Soon, they could be working as a sous chef in a popular local restaurant and dreaming of opening their own place one day.

(5) Construction MANAGEMENT
Construction managers oversee building projects, making sure that everything from homes to large commercial buildings is completed safely and on time.
This career requires a combination of practical skills and critical thinking.
According to the BLS, the demand for construction managers is expected to grow by 8% through 2031, making it a promising field for students who enjoy hands-on work and leadership roles.
Why High Schools Should Offer It BUILDING TRADES
High schools should offer trade programs that teach students the basics of construction, from reading blueprints to understanding safety regulations. These programs would allow students to get a taste of what it’s like to work in the construction field.
For example, high school students interested in construction take a course in carpentry and project management. They also learn how to read blueprints and organize materials.
After graduating, they decide to pursue further training through a four-year college degree in construction management, attend a local two-year community college, or start working right away in entry-level construction jobs.
Best Amazon Products for Construction Management Studies


(6) Dental Hygienists
Dental hygienists work alongside dentists to keep patients' teeth clean and healthy.
They clean teeth, take X-rays, and teach patients about proper oral hygiene.
The BLS projects that the demand for dental hygienists will grow by 9% through 2031, making it a stable and rewarding career option for students interested in healthcare.
Why High Schools Should Offer DENTAL HYGIENE PROGRAMS:
Offering a dental hygiene program in high school would give students a head start in this fast-growing field.
High school graduates could continue their education through a trade school program or an associate degree program in dental hygiene.
Within two years, they could be certified as dental hygienists and working in a dentist’s office, helping patients maintain their oral health, earning a good salary and enjoying job security.
(7) Plumbing
Plumbing is a skilled trade that involves installing and repairing water systems in homes and businesses.
Plumbers are essential workers who help keep our water systems running smoothly.
The BLS predicts a 5% growth in jobs for plumbers through 2031, making it a solid career choice for students interested in hands-on work.
Why High Schools Should Offer PROGRAMS IN PLUMBING
High schools should offer vocational programs in plumbing, giving students the chance to learn how to install and repair water pipes.
After completing their high school education, students could continue with further certifications or apprenticeships to become licensed plumbers.
With several years of experience, they can become a licensed plumber, eventually starting their own plumbing business and earning a great salary.
Plumbing offers great job security and a high earning potential, making it a smart choice for students looking for a stable career.
(8) Pharmacy Technicians
Pharmacy technicians play an important role in the healthcare system. They assist pharmacists in preparing and dispensing medications, and they are essential to the smooth operation of both retail and hospital pharmacies.
They also help manage inventory, work with insurance companies, and provide customer service to patients picking up their prescriptions.
According to the Bureau of Labor Statistics (BLS), demand for pharmacy technicians is expected to grow by 5% through 2031.
Why High Schools Should Offer PHARMACY TECH PROGRAMS
Pharmacy tech programs at the high school level can teach students essential skills like dosage calculations, medication management, and the legal aspects of working in a pharmacy.
Students who complete these programs could obtain certification through programs like the Pharmacy Technician Certification Exam (PTCE). With high school preparation, students can enter this healthcare field faster and at lower costs than pursuing a four-year degree.
Consider a student who completes a pharmacy tech program during high school.
After graduation, they pass the Pharmacy Technician Certification Exam (PTCE) and begin working in a retail pharmacy.
With real-world experience and certification, they are able to assist pharmacists and help patients manage their prescriptions efficiently.

(9) Auto Mechanics
Cars, trucks, and other vehicles are essential to modern life, and auto mechanics keep them running safely and smoothly.
Auto mechanics diagnose and repair various issues with vehicles, from routine maintenance like oil changes to more complex repairs like engine overhauls.
This field is always in demand, and the BLS projects a 1% growth in jobs for auto mechanics through 2031, with strong job security in most regions.
Why High Schools Should Offer AUTO MECHANIC PROGRAMS
High schools should offer auto mechanic programs that allow students to work directly with vehicles, gaining hands-on experience with tools, diagnostics, and repairs.
Auto mechanic programs provide students with practical skills that translate directly to job opportunities.
Best Amazon Products for Auto Mechanics Studies

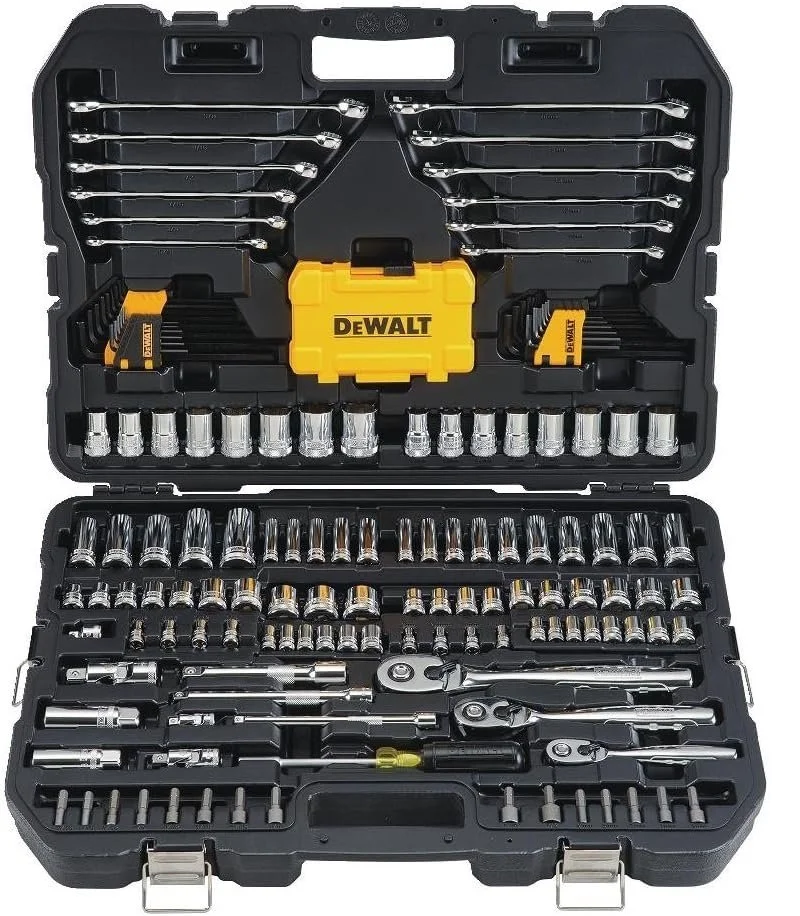


High school students interested in cars could take an auto mechanic program that allows them to work on school-owned vehicles.
After learning the basics of vehicle diagnostics, brake replacement, and engine repair, students who complete these programs could go on to earn certifications such as Automotive Service Excellence (ASE). This would qualify them to work in repair shops or dealerships or even start their own businesses.
Conclusion
Vocational programs in high schools offer students the opportunity to gain valuable hands-on experience and develop specific skills that prepare them for successful careers in high-demand fields.
From electrical work and HVAC technology to pharmacy tech and auto mechanics, these programs provide pathways for students to enter the workforce without the need for a four-year degree.
By offering trade programs in fields like medical assisting, culinary arts, construction management, and dental hygiene, students can explore a wide range of skilled trades that align with their interests and future career goals.
Programs like pharmacy technician allow students to enter the healthcare sector, while auto mechanic training gives them the chance to work in the growing automotive repair industry.
These vocational options give students the flexibility to choose a career path that works for them.
These programs also provide the foundation for further education and certifications, enabling students to continue growing in their fields.
High schools should expand their vocational offerings to give students more real-world experience and job training, ensuring they are prepared for skilled jobs in high-demand fields.
With these options, students have many ways to build successful careers without accumulating the debt and time commitment of a traditional college education.
By equipping students with practical skills and work-ready knowledge, high schools can better support students' transition into the workforce, giving them the tools they need to thrive in their chosen fields.
LEARN MORE About It


SOURCES / References
National Center for Education Statistics (NCES): https://nces.ed.gov/
Medical Assistants: https://www.bls.gov/ooh/healthcare/medical-assistants.htm
Chefs and Head Cooks: https://www.bls.gov/ooh/food-preparation-and-serving/chefs-and-head-cooks.htm
Construction Managers: https://www.bls.gov/ooh/management/construction-managers.htm
Dental Hygienists: https://www.bls.gov/ooh/healthcare/dental-hygienists.htm

13 Quick and Easy Head Wrap Styles for Natural Hair
Head wraps are a staple in fashion and hair care routines for many African women and women of African descent.
Head wraps are versatile, come in rich, vibrant colors and intricate patterns, and have a deep cultural significance and history.

Head wraps are a staple in fashion and hair care routines for many African women and women of African descent.
Head wraps are versatile, come in rich, vibrant colors and intricate patterns, and have a deep cultural significance and history.
Wearing head wraps is a centuries-old tradition in many regions of Africa.
Historically, these wraps were worn for a multitude of reasons, from signifying a woman's marital status to denoting social standing within the community.
In modern times, head wraps have transcended their traditional roots to become a global fashion statement embraced by women of all backgrounds.
In this article, you’ll explore 13 quick and easy head wrap styles for natural hair that will enhance your appearance and bring your wrapping game to the next level.
(1) The Classic Turban
The Classic Turban is an elegant head wrap. Its rich history spans ancient civilizations in the Middle East, South Asia, and Africa.
Worn for practical and cultural reasons, it symbolizes status, spirituality, and identity.
Today, the turban is a famous fashion statement recognized globally for its sophisticated and regal appearance.

HOW TO CREATE THE CLASSIC TURBAN
You'll need a rectangular scarf.
Hold the scarf horizontally and place the center at the back of your head. Bring the ends to the front and cross them over your forehead.
Twist the ends around each other once or twice, then wrap them back over your head, crossing at the back. Continue wrapping until the ends are used up.
Tuck the loose ends into the folds of the wrap to secure. Adjust the wrap to make sure it’s snug and even.
Here’s Why you’ll love THE CLASSIC TURBAN
The Classic Turban is perfect for formal events like weddings and galas but also great for casual outings.
It’s suitable for long, short, curly, or coily hair.
It protects your hair, maintains moisture, and prevents breakage.
(2) The High Bun Wrap
The High Bun Wrap is a popular choice. It’s elegant and practical.
HOW TO CREATE THE HIGH BUN WRAP
Gather your hair into a high bun at the top of your head. Secure it with a hair tie.
Take a rectangular scarf and place the middle at the back of your head. The scarf should be equal in length on both sides.
Bring the ends of the scarf to the front of your head, crossing them over your forehead.
Twist the ends around each other to create a rope-like effect.
Take the twisted ends and wrap them around the base of your bun.
Tuck the ends of the scarf into the folds at the back of your head to secure them in place. Use bobby pins if necessary. Ensure the wrap is snug but not too tight.

PHOTO CREDIT: LAIANA MATOS VIA PINTEREST
Here’s Why you’ll love THE HIGH BUN WRAP
You’ll appreciate the High Bun Wrap’s elegant and polished appearance. It’s suitable for both casual and formal occasions.
The high bun adds height and enhances your facial features.
It’s simple to create and a quick solution when you have a busy morning or are short on time.
The High Bun Wrap is favored for elevating any outfit and for its practicality in managing and protecting natural hair.
(3) The Erykah Badu Inspired Wrap
Erykah Badu, an iconic figure in music and fashion, is known for her bold and artistic head wrap styles.
Her distinctive styles often feature tall, elaborate wraps that make a powerful fashion statement and celebrate African heritage and individuality.
HOW TO CREATE The Erykah Badu Inspired Wrap
If your hair is long, tie it into a high bun or use a wig cap to create a smooth base.
Use a large, stiff African headwrap like an African wax print fabric. Fold the fabric in half lengthwise.
Position the center of the folded wrap at the back of your head and bring the ends to the front.
Twist the ends tightly together at the front of your head. Lift the twisted ends upwards, creating more height.
Wrap the twisted fabric around the top of your head. Add layers to achieve the desired height and boldness. Tuck the loose ends into the folds to secure the wrap in place.
Here’s Why you’ll love The Erykah Badu Inspired Wrap
The Erykah Badu Inspired Wrap is a striking fashion statement with deep cultural significance.
It celebrates African heritage, paying homage to traditional headwrap styles worn by African women for centuries.
This wrap can elevate your style by adding a unique and powerful element to your look.
(4) The Front Bun Wrap
The Front Bun Wrap is an elegant and sophisticated head wrap style where the bun is positioned at the front of your head.
This style accentuates grace and can enhance any outfit. It’s ideal for formal events and special occasions.
The bun at the front adds a unique and eye-catching element to your overall look, creating a regal and polished appearance.
HOW TO CREATE THE FRONT BUN WRAP
If your hair is long, tie it into a low bun or ponytail to create a smooth base.
Use a long, rectangular scarf. Place the center of the scarf at the back of your head and bring the ends to the front.
Cross the ends over your forehead and twist them together tightly.
Wrap the twisted ends into a bun at the front of your head. Ensure the bun is secure and the twists are tight enough to hold the shape.
Tuck the loose ends into the folds of the wrap or secure them in place with bobby pins. Adjust the bun to ensure it is even and centered.

VIA PINTEREST - FRONT BUN WRAP VARIATION
Here’s Why you’ll LOVE THE FRONT BUN WRAP
The Front Bun Wrap suits special occasions such as weddings, galas, and cultural celebrations.
Its elegant look complements formal attire, adding a touch of sophistication and uniqueness.
The style highlights your features and stands out as a statement piece. It’s perfect for attending events where you want to make an impression.
(5) The Pineapple Style wrap
The Pineapple Style Wrap is a favorite among women with curly and coily hair textures. It helps retain moisture and reduces breakage.
It protects curls while maintaining their definition and prevents curls from getting flattened or frizzy overnight.
This style keeps your curls intact and is a great way to extend the life of your wash day.

Via Pinterest — ItsZeenaEdwards
HOW TO CREATE THE PINEAPPLE STYLE WRAP
Ensure your hair is dry and detangled. To maintain hydration, apply a leave-in conditioner or a light moisturizer.
Gently gather all your hair into a high ponytail at the top of your head. Use a soft, snag-free hair tie to secure it without pulling too tightly.
Take a large, rectangular head scarf and fold it into a triangle. Place the middle of the scarf at the back of your head, bringing the two ends to the front.
Tie the ends of the scarf into a knot at the front of your head, just above your forehead.
Take the loose ends of the scarf and wrap them around the base of the ponytail, then tie them securely or tuck them into the scarf to keep everything in place.
Here’s Why you’ll love THE PINEAPPLE STYLE WRAP
The Pineapple Style Wrap is highly effective as a protective hairstyle for overnight use.
Keeping your hair on top of your head prevents curls from being crushed against your pillow, which helps maintain your style’s shape and definition.
Additionally, wrapping your hair with a head scarf made of satin or silk reduces friction, which minimizes frizz and breakage.
This method ensures you wake up with well-preserved curls requiring minimal restyling.
(6) The Top Knot WRAP
The Top Knot Wrap is a chic, simple style for any hair length.
This style is quick to achieve and adds a touch of elegance to your look.
HOW TO CREATE THE TOP KNOT WRAP
Gather your hair into a high ponytail or bun at the top of your head. Use a hair tie to secure it in place.
Take a long, rectangular piece of fabric and place the center at the back of your head. Bring the ends to the front.
Cross the ends over your forehead and twist them together tightly.
Take the twisted ends and wrap them around the base of your bun, creating a knot.
Tuck the loose ends into the folds of the wrap to secure them. Adjust the fabric to ensure it covers the bun evenly and is snug.
Here’s Why you’ll love THE TOP KNOT WRAP
The Top Knot Wrap is versatile.
It’s a stylish and practical option for all hair lengths and textures.
If you have long hair, it helps keep your hair off your neck and out of the way, giving you a clean and sophisticated appearance.
If you have short hair, the top knot adds volume and interest to your look without needing extra styling.
(7) The Layered Wrap
The Layered Wrap is a sophisticated and elegant head wrap style that layers multiple folds of fabric around your head.
This style adds depth and texture to the wrap.
It is a striking and fashionable choice for special occasions.
HOW TO CREATE THE LAYERED WRAP
Style your hair as desired. You can leave it down, tie it in a low bun, or use a wig cap for a smooth base.
Take a long, rectangular scarf and place the middle at the back of your head, with equal lengths on both sides.
Bring the ends of the scarf to the front of your head, crossing them over your forehead.
Create the first layer by folding one end of the scarf back over your head, creating a smooth, even layer.
Take the other end of the scarf and fold it back over your head, slightly overlapping the first layer.
Continue this process, alternating sides and creating multiple layers of fabric around your head.
Once you have created the desired number of layers, tuck the loose ends into the wrap folds to secure them. If necessary, use bobby pins for additional security.
Ensure the wrap is snug and even and the layers are smooth and well-positioned.
Here’s Why you’ll like THE LAYERED WRAP
The Layered Wrap is elegant, sophisticated, and perfect for formal events and special occasions.
The layered fabric adds depth and texture, creating a striking and memorable look.
(8) The Low Bun Wrap
The Low Bun Wrap is a simple and stylish head wrap style with a low bun at the nape of the neck.
Known for its understated elegance and ease of creation.
It’s a perfect choice for both casual and formal occasions.
how to create the low bun wrap
Start by gathering your hair into a low bun at the nape of your neck. Secure it with a hair tie.
Take a long, rectangular scarf and place the middle at the back of your head, with equal lengths on both sides.
Bring the ends of the scarf to the front, crossing them over your forehead.
Twist the ends together and bring them back to the nape of your neck. Wrap the twisted ends around the base of your bun.
Tuck the loose ends into the scarf folds around the bun to secure it. Ensure the wrap is snug but comfortable.
Here’s Why you’ll love the low bun wrap
The Low Bun Wrap protects your hair from environmental damage and reduces friction.
It prevents breakage and split ends.
Keeping the hair tucked away helps maintain moisture levels and protects your hair follicles, promoting overall hair health.
It is particularly beneficial for natural and curly hair, minimizing manipulation and stress on the hair.
(9) The Wrap with a Bow
Adding a bow to your head wrap is a cute and versatile style. It can be dressed up or down for any occasion.
This style works well with different colors and fabrics, including satin and silk scarves.
The Wrap with a Bow is a charming and playful head wrap style with a bow tied at the front of the crown.
The bow is a focal point that adds a whimsical element to the head wrap.

HOW TO CREATE THE WRAP WITH A BOW
Style your hair as desired. You can leave it down, tie it in a low bun, or use a wig cap to create a smooth base.
Take a long, rectangular scarf and place the middle at the back of your head, with equal lengths on both sides.
Bring the ends of the scarf to the front of your head, just above your forehead, and tie the ends into a single knot at the front of your crown.
Form two loops (one at each end of the scarf) to create the bow, which resembles bunny ears.
Cross one loop over the other and pull it through the hole created by the crossing loops, forming a bow.
Adjust the size of the bow and the tightness of the knot to your liking. Tuck in any loose ends or secure them with bobby pins if necessary.
Here’s Why you’ll love THE WRAP WITH A BOW
The Wrap with a Bow is highly versatile and can be styled with various colors and fabrics to match different outfits and occasions.
Satin and silk scarves are particularly popular choices. They add a touch of elegance and shine to your look.
Additionally, these fabrics are gentle on the hair, reducing friction and helping to maintain moisture.

WRAP WITH A BOW via Pinterest (TheWrap.Life)
(10) The twisted CROWN Wrap
The Twisted Crown is a stylish and protective style for all hair types.
This style protects your hair and adds a unique twist to your look.

HOW TO CREATE THE TWISTED CROWN WRAP
Start with your hair styled as desired. You can leave it down, tie it in a low bun, or use a wig cap for a smooth base.
Take a long, rectangular scarf and place the middle at the back of your head, with equal lengths on both sides.
Starting from the base of your head, tie the ends of the scarf.
Twist the ends around each other to create one long twisted rope. This motion should be tight enough to hold its shape but not too tight to cause discomfort.
Once the entire length of the scarf is twisted, bring the twisted section back over your head, following your hairline.
To secure the loose ends of the twist, tuck them into the wrap folds. For additional security, use bobby pins or clips.
Adjust the wrap to ensure it’s snug and even, ensuring the twist is well-positioned and the scarf covers your hair completely.
Here’s Why you’ll love THE TWISTED CROWN WRAP
The Twisted Crown Wrap adds volume.
It's an excellent option for short or long hair.
For longer hair, this twisted wrap helps keep hair off the neck and tamed, providing a neat and polished look.
The wrap gives excellent protection and helps maintain moisture and reduce friction.

(11) The TWISTED HALO Wrap
The Twisted Halo Wrap is a regal and sophisticated style perfect for formal events.
This style adds a touch of elegance and celebrates African heritage.
HOW TO CREATE THE TWISTED HALO WRAP
Style your hair as desired. You can leave it down, tie it in a low bun, or use a wig cap for a smooth base.
Take a long, rectangular scarf and place the middle at the back of your head, with equal lengths on both sides.
Bring the ends of the scarf to the back of your head and tie them into a knot.
Twist the loose ends of the scarf tightly to create two long, twisted ropes.
Lift the twisted ends and wrap them around the top of your head in a circular motion, following your hairline to form a halo.
Once you have wrapped the twisted ends around your head, depending on the length, you can twist them together once or twice at the front, then tuck the loose ends into the folds of the wrap at the sides and back of your head.
Use bobby pins if necessary to keep the halo in place. Ensure the wrap is snug and the halo is evenly positioned around your head.
Here’s Why you’ll LOVE the TWISTED HALO WRAP
The Halo Wrap is a majestic and elegant style that creates a halo-like effect around your head.
The Twisted Halo Wrap is perfect for making a bold and beautiful statement.
It is especially suitable for formal events, cultural celebrations, and occasions where you want to make a striking impression.
It adds a touch of grandeur to any look.

(12) The GELE Wrap
The Gele Wrap is a traditional Nigerian head wrap known for its elaborate and structured appearance. Gele is pronounced “gay-lay.”
It signifies elegance, status, and cultural pride.
Made from stiff, ornate fabric such as aso-oke or brocade, the Gele is worn for special occasions like weddings, festivals, and ceremonies.
HOW TO CREATE THE GELE WRAP
Though the Gele Wrap may not appear to be a quick and straightforward style, you’ll be amazed at what you can accomplish once you understand its structure. And put in some practice time.
To recreate the Gele Wrap, view the video: “How to Tie Fan Gele on Yourself - Gele Styles - Gele Tutorial” and read the following instructions.
[There is also a simpler version below.]
STEP-BY-STEP INSTRUCTIONS FOR THE GELE WRAP
Prepare Your Hair:
Style your hair into a low bun or ponytail to create a smooth base. If your hair is short, brush it back or use a wig cap to keep it flat.
Position the Gele:
Start by folding the gele fabric into a width about half its original size. Place the center of the folded gele at the back of your head, ensuring one of the ends is shorter.
Create the First Pleat:
Hold the gele firmly on both sides and create the first pleat by folding the fabric at your forehead.
Pinch a small section of the fabric and fold it inward, creating a crisp line. Secure this pleat in place with your hand.
Continue Pleating:
With your fingers, continue to create more pleats by folding the fabric inward, one pleat at a time, moving from one side of your forehead to the other.
Make sure each pleat overlaps the previous one slightly.
Work your way across your forehead, ensuring the pleats are even and neat.
Use your fingers to smooth and adjust the pleats as you go.
Secure the First Side:
Once you’ve created enough pleats at the front, take one end of the gele (preferably the shorter side) and pull it tightly across the back of your head.
Tuck this end under the opposite side of the fabric, near your ear, and secure it with pins if necessary.
Wrap the Remaining Fabric:
Bring the longer side of the gele over the top of your head, covering the pleats you just created. As you bring it around, continue to form pleats similarly, folding and adjusting to keep them even.
Cross and Tuck:
Once you’ve brought the longer side of the gele to the back of your head, cross it over the shorter side already tucked in.
Pull it tightly to ensure it stays in place, and tuck the remaining fabric securely under the folds at the back of your head.
Final Adjustments:
Adjust the gele so that it fits snugly but comfortably around your head. You may need to reposition some pleats or smooth out the fabric.
Ensure the gele is secure and the pleats are neat and well-defined.
Secure the Pleats:
If you want extra security, you can use pins to hold the pleats in place. Carefully insert pins into the pleats at the sides or back of your head, making sure they are not visible.
Finishing Touches:
Stand in front of a mirror and do a final check of the gele. Make sure it’s symmetrical and that the pleats are neatly arranged. Adjust any loose sections as needed.
Tips for Wrapping a Pleated Gele
Practice Makes Perfect: Wrapping a gele, especially with pleats, can take some practice. Don’t be discouraged if it takes a few tries to get it right.
Mirror: To help you see the back of your head, use a large mirror or two mirrors positioned at different angles.
Pins: Keep pins handy for securing the gele as you go, especially if you’re wrapping it yourself.
With these steps, you can confidently wrap a pleated gele, achieving an elegant and traditional look. The more you practice, the easier it will become, and soon you'll be able to wrap your gele quickly and effortlessly for any occasion.
HERE’S WHY YOU’LL LOVE THE GELE WRAP
The Gele Wrap is especially suitable for formal events and cultural celebrations.
It’s great for any occasion you want to make a grand and elegant statement.
Beautiful. Stunning. Structured.
It complements traditional and formal attire.

GELE HEAD WRAP
How To Do Simple But Elegant Gele With No stress
(13) The DOEK Wrap
The Doek Wrap, also known as Duku or Dhuku, is a head wrap worn by women in Ghana and other parts of West Africa. Doek is pronounced “duke.”
Unlike the often stiff and structured gele, the doek is typically made from softer fabrics like cotton or wax print fabric, making it easier to tie and wear in various styles.
HOW TO CREATE THE DOEK WRAP
Style your hair smooth or braided close to the scalp.
The doek is placed at the back of your head and is of equal length on both sides.
The ends are brought to the front or side and tied into a knot.
The loose ends can be tucked in or arranged into various styles, such as a bow, rosette, or turban-like folds.
Here’s Why you’ll love THE DOEK WRAP
The Doek Wrap is an incredibly quick and easy style.
While it is also worn at special events, it is more commonly used in everyday life.
Great for casual outings, family gatherings, and market days.
As you explore the world of head wraps, experiment with different styles and fabrics to discover the perfect look that complements your unique personality and lifestyle.


Customizing your wraps with your preference of fabric and colors gives them personal expression and versatility.
Make a bold statement with vibrant patterns. Choose the luxurious feel of elegant silk or the practicality and comfort of cotton.
There’s a head wrap style that’s just right for you!


Each wrap tells a story, celebrates culture, and offers a way for you to express yourself, no matter the occasion.
Embrace the universal beauty of head wraps for daily or special occasions.
Don’t be afraid to try something new—mix and match different fabrics, play with various wrapping techniques, and find the styles that make you feel confident and empowered.
Share your favorite head wrap styles and experiences with others.
Whether through social media, with friends, or in your community, your creativity and style can inspire others to explore the rich tradition of head wraps.
Celebrate the beauty, heritage, and individuality that head wraps bring into our lives.


Afrofuturism: Imagining the Future Through a Black Lens
Imagine a world where African cultures blend with advanced technology, Black people lead space missions, and ancient African myths shape futuristic cities.
This is the world of Afrofuturism.

INTRODUCTION
Imagine a world where African cultures blend with advanced technology, Black people lead space missions, and ancient African myths shape futuristic cities.
This is the world of Afrofuturism.
This article will explore the origins and concept of Afrofuturism, its expression in visual arts and literature, its impact on music and pop culture, and its role in empowering the Black community and shaping new futures.
By delving into the works of key figures and examining the influence of Afrofuturism in various artistic forms, you can uncover the power of Afrofuturism in reimagining the future through a Black lens.
(1) WHAT IS Afrofuturism?
Afrofuturism is a cultural movement combining science fiction, historical fiction, fantasy, and Afrocentrism elements to reimagine the past, present, and future through a Black cultural lens.
It seeks to explore the history of Black futures by envisioning possible futures that celebrate Black identity, creativity, and liberation.
Historical Context
Afrofuturism emerged against significant historical events that shaped the Black experience.
The civil rights movement of the 1960s was a pivotal period, as African Americans fought for equality and justice in the United States.
This era saw Black creativity and political activism eruption, which laid the groundwork for Afrofuturist thought. The African diaspora, which refers to the worldwide communities descended from native Africans, also played a crucial role.
The forced migration and displacement of Black people during the transatlantic slave trade, coupled with colonial and postcolonial histories, created a rich tapestry of cultures and experiences that Afrofuturism draws upon to imagine possible futures.
Key Figures
Several influential figures have shaped Afrofuturism through their visionary works:
Octavia E. Butler, Writer (1947–2006)
A pioneering science fiction author, Butler used her novels to explore themes of race, gender, and power.
Her works, such as “Kindred” and the “Parable” series, envision futures where Black protagonists confront and overcome societal challenges.

Sun Ra — A jazz musician and bandleader, he combined music with cosmic philosophy.
Born Herman Poole Blount (1914–1993), he claimed to be from Saturn and used his music to explore space travel and African heritage themes, creating a unique blend of sound and storytelling.

SUN RA
George Clinton — Leader of the Bands Parliament and Funkadelic
Clinton (born July 22, 1941) brought Afrofuturist themes to the forefront of popular music.
His elaborate stage performances and album art depicted futuristic and otherworldly landscapes, celebrating Black creativity and imagination.
Parliament-Funkadelic (P-Funk) revolutionized funk music with its cosmic themes and eccentric stage performances.
P-Funk’s influence extends beyond music, shaping Afrofuturism’s visual and cultural landscape.
Albums like “Mothership Connection” transport listeners to outer space. It blends funk rhythms with science fiction narratives.
Speculative Fiction and Black Culture
Afrofuturism incorporates speculative fiction and science fiction elements to reimagine the future through a Black cultural lens.
By blending traditional African mythology with futuristic themes, Afrofuturism creates narratives that challenge existing power structures and envision new possibilities for Black people.

For example, speculative fiction allows for exploring advanced technology in African societies, creating worlds where Black characters lead space missions or develop groundbreaking innovations.
Tananarive Due, author of speculative fiction, is known for her compelling exploration of historical and futuristic themes.
Her work often delves into the complexities of African American history, weaving elements of supernatural and science fiction into her narratives.
Due's acclaimed novels, such as "The Good House" and "My Soul to Keep," highlight her talent for blending horror with cultural and social commentary.

TANANARIVE DUE, AUTHOR
These stories often address issues such as white supremacy, colonialism, and the struggle for Black liberation, using the genre’s flexibility to craft empowering and imaginative futures.
“But speculative fiction is also an important place to explore social, political, and economic issues… Octavia Butler’s Kindred uses the appeal of a time-traveling narrative to discuss the long-lasting trauma of slavery, as well as to spotlight many other social issues.”
Through this blend of speculative fiction and Black culture, Afrofuturism offers a way of imagining new worlds where Black identity and experiences are central.
It celebrates the richness of African heritage while looking forward to more inclusive and hopeful futures.

(2) Afrofuturism in Visual Arts and Literature
Visual Arts
Afrofuturism is vividly expressed in visual arts, where artists use their creativity to merge African culture with futuristic visions.
John Jennings is a prominent figure in this field, known for his powerful illustrations that explore themes of race, identity, and technology.
His work often features bold colors and dynamic compositions, creating striking visual narratives challenging conventional perspectives.
Additionally, the growing global recognition of Afrofuturist works, such as the exhibit at the Smithsonian’s National Museum of African American History and Culture (NMAAHC) (March 24, 2023 - August 18, 2024), highlights the movement’s expanding impact and potential to shape cultural and societal norms.

The Smithsonian Afrofuturism exhibition showcases various visual art pieces highlighting the movement’s impact and significance.
This exhibition aims to celebrate the art of Afrofuturism and its role in reimagining the future through a Black cultural lens.
Literature
Notable Afrofuturist authors have significantly contributed to Black science fiction, enriching the genre with their unique perspectives and storytelling.
Nnedi Okorafor
Okorafor’s works, such as “Who Fears Death” and the “Binti” series, blend African folklore with speculative fiction.
Her stories often feature strong Black female protagonists who navigate complex worlds and face extraordinary challenges, offering a fresh and empowering perspective on the future.

Nnedi Okorafor
N.K. Jemisin — Jemisin has garnered critical acclaim for her innovative and thought-provoking novels.
Her “Broken Earth” trilogy, which won multiple Hugo Awards, explores themes of oppression, survival, and resilience in a fantastical yet deeply human context.
Jemisin’s work pushes the boundaries of science fiction and fantasy, creating rich, immersive worlds that resonate with contemporary social issues.

N.K. Jemisin
Comics and Graphic Novels
Comic books and graphic novels play a crucial role in Afrofuturism, bringing its themes to a broader audience through visual storytelling.
One of the most influential characters in Afrofuturist comics is Black Panther.
“Black Panther” is a landmark in Afrofuturist cinema. It depicts the advanced African nation of Wakanda, blending traditional African culture with cutting-edge technology.
The film’s success highlights the power of Afrofuturist storytelling in challenging stereotypes and presenting a positive vision of Black identity.

THE BLACK PANTHER
Created by Stan Lee and Jack Kirby.
Later redefined by Black creators like Ta-Nehisi Coates.
Black Panther represents a powerful vision of an advanced African nation, Wakanda.
The character and his world challenge stereotypes and offer a positive, empowering portrayal of African culture and leadership.
Besides Black Panther, many graphic novels and comics explore Afrofuturist themes.
Nilah Magruder—An emerging voice in Afrofuturism.
Nilah Magruder is known for her graphic novel “M.F.K.,” which blends fantasy and science fiction elements in a post-apocalyptic world.
Her work features diverse characters and explores survival, community, and resilience themes. Magruder’s storytelling and artwork highlight her unique perspective and contribute significantly to the Afrofuturist narrative in graphic literature.
Jeremy Love—Author and illustrator of the graphic novel “Bayou.”
Love combines Southern Gothic horror with elements of Afrofuturism. The story follows a young Black girl named Lee Wagstaff, who ventures into a parallel world to rescue her father, confronting racism and supernatural creatures.
Love’s work in “Bayou” intertwines African American folklore with speculative fiction, creating a narrative that explores deep cultural themes and imagines new possibilities for Black futures.
David F. Walker—Co-creator of the critically acclaimed series “Bitter Root.”
Walker blends horror, fantasy, and Afrofuturism to tell the story of the Sangerye family, who battle supernatural forces in 1920s Harlem.
This graphic novel series addresses themes of racism, family, and survival, offering a potent mix of historical context and speculative fiction.
Walker’s work in “Bitter Root” is a significant contribution to Afrofuturist literature, highlighting the struggles and strengths of Black communities through an imaginative lens.

Through visual arts, literature, and graphic novels, Afrofuturism creates a multifaceted and vibrant exploration of Black futures.
It celebrates the richness of Black culture and imagination while addressing contemporary issues and envisioning new possibilities.
(3) Afrofuturism in Music and Pop Culture
Music
Afrofuturism profoundly impacts music, where artists blend futuristic sounds and themes with elements of Black culture.
Janelle Monáe—Known for her genre-blending music and bold artistic vision.
Monáe incorporates Afrofuturist themes in her albums and performances.
Her album “The ArchAndroid” tells a story set in a dystopian future, exploring issues of identity, freedom, and self-expression.
Monáe’s work often features elaborate costumes and futuristic aesthetics, making her a key figure in the Afrofuturist music scene.


Erykah Badu—Celebrated singer-songwriter.
Badu’s work frequently includes themes of spirituality and future worlds.
Often referred to as the “Queen of Neo-Soul,” Badu’s music blends soulful melodies with thought-provoking lyrics that explore metaphysical concepts and cultural identity.
Albums like “New Amerykah Part One” and “Mama’s Gun” showcase her ability to fuse past and future influences, creating a timeless and forward-looking sound.
Badu’s unique blend of spirituality, social commentary, and Afrofuturist themes has solidified her place as a transformative figure in contemporary music.
Outkast—Iconic hip-hop duo André 3000 and Big Boi.
Outkast is renowned for their innovative sound and Afrofuturist themes, particularly evident in their album “ATLiens.”
The album explores otherworldly narratives and futuristic aesthetics, blending Southern hip-hop with cosmic and science-fiction elements.
Outkast’s music often addresses themes of individuality, societal norms, and the search for identity, challenging conventional boundaries and pushing the genre forward.
Their creative vision and genre-defying approach have made Outkast a pivotal influence in hip-hop and Afrofuturism.
Music Videos
Music videos are powerful for expressing Afrofuturist themes, often combining striking visuals with futuristic narratives.
Missy Elliott—Music videos that often incorporate Afrofuturist themes.
They blend futuristic visuals with innovative choreography and fashion.
Her video for “Sock It 2 Me” features a sci-fi narrative where she dons a spacesuit and battles alien creatures, creating a unique blend of hip-hop and science fiction.
Elliott’s creative vision and use of cutting-edge technology in her videos challenge conventional norms and push the boundaries of visual storytelling.
Her distinctive style and Afrofuturist aesthetics have made her a trailblazer in the music industry, influencing countless artists and visual creators.
will.i.am and the Black Eyed Peas—Often incorporate Afrofuturist elements.
For example, the “Meet Me Halfway” video features futuristic landscapes and advanced technology, blending Afrofuturist aesthetics with the band’s distinctive sound.
These visuals help to convey themes of unity and progress, aligning with the core principles of Afrofuturism.
Beyoncé’s—“Black Is King” album is a powerful testament to Afrofuturism.
The “Already” video featuring Shatta Wale and Major Lazer showcases vibrant African aesthetics combined with advanced technology and cosmic elements.
Beyoncé’s use of traditional African symbols and futuristic visuals creates a rich tapestry that honors the past while envisioning an empowered future.
Her work in “Black Is King” redefines mainstream music videos, incorporating Afrofuturist themes to inspire and uplift the Black community.
Pop Culture
Afrofuturism has also made significant inroads into movies and TV shows, bringing its imaginative visions to mainstream audiences.
Star Trek—Lt. Nyota Uhura, played by Nichelle Nichols.
Lt. Nyota Uhura, portrayed by Nichelle Nichols (1932-2022), is a groundbreaking character in the “Star Trek” series, serving as the communications officer on the starship USS Enterprise.
Her presence in the 1960s television show was revolutionary, providing one of the first positive portrayals of a Black woman in a significant, non-stereotypical role on American TV.
Uhura’s character inspired countless viewers, including future astronauts and scientists, and was crucial in advancing racial representation in media.
Nichols’ portrayal also contributed to the Afrofuturist narrative by placing a Black woman in a future where race and gender are not barriers to professional achievement.

VIDEO: Nichelle Nichols Met Dr. Martin Luther King, Jr. - Why She Remained on Star Trek
Afrofuturism continues to inspire and influence through music, pop culture, and music videos, offering a rich tapestry of sounds, images, and narratives that celebrate Black culture and envision new futures.
(4) IMPACT ON BLACK IDENTITY AND LIBERATION
Afrofuturism is crucial in empowering the Black community and shaping Black identity.
Afrofuturism allows Black people to see themselves as integral parts of futuristic and technologically advanced societies by reimagining the future through a Black cultural lens.
This reimagining challenges stereotypes and provides positive representations of Black characters who are leaders, innovators, and heroes.
For instance, characters in works by authors like Octavia E. Butler and Nnedi Okorafor often portray strong, intelligent Black individuals who navigate and reshape their worlds.
These portrayals help to build a sense of pride and possibility within the Black community, encouraging self-expression and a deeper connection to cultural roots.
Community and Liberation
Afrofuturism is deeply intertwined with the themes of community and liberation.
By drawing on the African diaspora’s rich history and diverse cultures, Afrofuturism fosters a sense of unity and shared identity among Black people worldwide.

This cultural movement promotes the idea that liberation is not just about physical freedom but also mental and cultural emancipation.
Through exploring alternative histories and speculative futures, Afrofuturism encourages Black communities to envision and strive for a world free from oppression and inequality.
Works like those of author Ytasha L. Womack and musician Sun Ra emphasize the importance of reclaiming and redefining Black identity, offering visions of a future where Black liberation is fully realized.
Afrofuturism’s focus on empowerment, new futures, and liberation contributes to a more empowering future for the Black community.
Afrofuturism VS Africanfuturism
Afrofuturism:
Focus: Centers on the African diaspora, particularly in the United States.
Themes: Deals with African-American history, culture, and themes in the context of technology and speculative fiction.
Origin: Coined by Mark Dery, a White critic, in 1993 and expanded by Alondra Nelson.
Perspective: Often includes narratives influenced by the Western experience and the impact of historical oppression.
In August 2020, Hope Wabuke, a writer and assistant professor at the University of Nebraska-Lincoln, highlighted that Afrofuturism, as coined by Mark Dery, addresses African-American themes within twentieth-century technoculture.
Alondra Nelson later expanded on this, arguing that Dery’s concept of Blackness starts in 1619 and is marked by 400 years of violation. Wabuke criticized this view for lacking the "Black American diasporic imagination" and failing to envision Blackness independently of Whiteness.
Africanfuturism:
Focus: Centers on African culture, history, mythology, and perspectives.
Themes: Deeply rooted in African contexts and does not prioritize the West.
Origin: Coined by Nigerian-American writer Nnedi Okorafor in 2019.
Perspective: Seeks to create narratives free from the Western gaze, focusing on African experiences and futuristic visions.
In contrast, Africanfuturism, as defined by Nnedi Okorafor, branches into the Black diaspora without centering the West.

Wabuke emphasized that Africanfuturism avoids the "white Western gaze" and offers a distinct outlook from mainstream Western and American science fiction.
“Where do Africa and the diaspora sit on the key issues that are confronting us?” — Onyekachi Wambu
Addressing current challenges involves examining Africa's and the diaspora's roles in technology, environmental changes, genetic manipulation, and resource scarcity.
These movements focus on how imagination and creativity can shape new worlds.
New Futures
Afrofuturism envisions new futures that challenge existing power structures and white supremacy.
Afrofuturism provides a counter-narrative to the often marginalized and oppressed roles assigned to Black people in mainstream media by imagining worlds where Black people are central to technological and cultural advancements.
For example, the advanced African nation of Wakanda in “Black Panther” represents a future where African culture and technology thrive without the impact of colonialism.
This vision of new futures inspires hope and serves as a critique of current societal inequalities, pushing for a re-evaluation of history and creating more inclusive and equitable future societies.
By celebrating Black culture, creativity, and resilience, Afrofuturism imagines and actively works toward a world where Black people can thrive and lead in every sphere of life.
(5) Afrofuturism in the Modern World
Afrofuturism significantly influences technological innovation and reimagining a future with advanced technology.
Afrofuturism challenges the often exclusionary narratives of technological development by envisioning scenarios where Black people are at the forefront of technological progress.
For example, in the movie “Black Panther,” Wakanda is depicted as a highly advanced society with cutting-edge technology derived from the natural resource vibranium.
This portrayal showcases the potential for technological innovation within African contexts and inspires real-world technological aspirations and achievements among Black innovators and entrepreneurs.
Afrofuturism encourages the integration of cultural heritage with modern technology, creating a unique and inclusive vision of the future.
Artistic Movement
Afrofuturism is more than just a genre; it is a vibrant artistic movement that spans various forms of expression, including visual arts, literature, music, and fashion.
This movement is significant in contemporary culture as it allows Black voices and creativity to flourish.
Artists like Janelle Monáe and John Jennings are pivotal in bringing this movement to a broader audience.
Monáe crafts futuristic music and performances, and visual artist John Jennings creates powerful Afrofuturist imagery.
Afrofuturism challenges traditional artistic norms and pushes the boundaries of creative expression, making it a crucial part of today’s cultural landscape.
Its influence is seen in the growing interest in themes of race, identity, and future possibilities in mainstream media and art.
Future Possibilities
The future of Afrofuturism holds immense potential to create new possibilities for Black people worldwide.
As an evolving movement, Afrofuturism continues to inspire and empower through its imaginative visions and critical perspectives on society.
Promoting an inclusive and forward-thinking worldview can influence education, policy, and social change. Afrofuturism can drive progress in science, technology, and the arts by envisioning futures where Black people are leaders and innovators.
Afrofuturism offers a robust framework for imagining and creating a more equitable and inclusive world by emphasizing technological innovation, artistic expression, and envisioning new futures. Its influence will likely continue to grow, opening up new possibilities and opportunities for Black communities around the globe.
Explore Afrofuturist works and immerse yourself in imaginative and empowering visions.
Read books by authors like Octavia E. Butler and Nnedi Okorafor.
Listen to the music of Janelle Monáe and Sun Ra.
Watch films like “Black Panther.”
By engaging with these works, you can contribute to the ongoing conversation about the future of Black identity and culture.
(6) LEARN MORE / RELATED ARTICLES


RELATED ARTICLES


(7) FREE LESSON PLAN
FREE DOWNLOAD


Gardening in Small Spaces: Vertical Gardening Ideas
Vertical gardening is a dynamic and innovative approach to gardening that makes excellent use of limited space.
It is particularly suited for urban environments or homes with small yards.

Vertical gardening is a dynamic and innovative approach to gardening that makes excellent use of limited space.
It is particularly suited for urban environments or homes with small yards.
It's a great solution for city dwellers and anyone looking to maximize their gardening potential in constrained areas.
(1) Understanding Vertical Gardening
What is Vertical Gardening?
Vertical gardening is a method where plants are grown upwards using trellises, stakes, walls, or towers instead of being spread out over the soil surface.
This method involves growing plants vertically using various structures or supports rather than spreading them across valuable and often scarce ground space.
This gardening style is particularly beneficial for city dwellers or individuals with limited outdoor spaces.
It efficiently uses vertical areas—such as walls, balconies, and even doorways—allowing for lush, productive gardens in places where traditional gardening is not feasible.
It's an excellent choice for maximizing greenery without sacrificing limited living space, offering an innovative solution to cultivate plants in dense urban settings.


What are the benefits of vertical gardening?
Saves Precious Floor Space.
Allowing for more efficient use of limited areas.
Adds a Unique Visual Appeal.
It allows for layers of lush greenery and vibrant flowers, which can turn bare walls or balconies into lively natural tapestries.
Flexibility to Cultivate Diverse Plants.
From small vegetables and herbs to ornamental flowers. Provides beauty and the practicality of homegrown produce.
Which Plants Are Suitable for Vertical Gardens?
The types of plants suitable for vertical gardens include leafy greens, perennial vines, and edible flowers.
A wide variety of plants thrive in vertical gardens, which can cater to both aesthetic desires and practical needs.

Leafy greens like spinach, lettuce, and Swiss chard are perfect for edible vertical gardens because they require less space and can grow quickly.

Additionally, edible flowers like nasturtiums, violets, and marigolds bring a splash of color to vertical arrangements. They can be used to garnish dishes, adding both visual appeal and unique flavors to meals.

Perennial vines, such as clematis, jasmine, and honeysuckle, not only add beauty and fragrance but can also create living green screens that enhance privacy and reduce noise pollution.
These plants demonstrate the versatility and functionality of vertical gardening, making it a rewarding endeavor for gardeners of all skill levels.
(2) Vertical Garden Designs and Ideas
The following designs and ideas use materials that are readily available and can add a unique touch to your vertical garden.
Wooden Pallets
Wooden pallets are versatile and economical materials for creating vertical gardens, offering a wide range of possibilities for both functional and decorative garden elements.
Their simple structure, with a series of horizontal and vertical slats, makes them ideal for repurposing into various garden designs.
Wooden pallets are typically easy to find, but they also allow for a creative use of space. They provide a foundation for growing different plants vertically, whether leaning against a wall or standing upright.


These pallets can be transformed into vertical garden planters by adding backing and lining to create compartments for soil and plants.
This approach enables gardeners to grow a variety of plants in limited spaces, such as balconies, patios, or small backyards.
By drilling drainage holes, the pallets ensure that water does not pool and cause root rot, promoting healthy plant growth.
Wooden pallets can accommodate different garden styles and themes. Whether you want a colorful flower garden, a practical herb garden, or even a vegetable garden, these pallets offer a simple, cost-effective way to build a vertical garden tailored to your space and needs.
Their inherent flexibility allows for customization and creativity, making wooden pallets an excellent starting point for anyone interested in vertical gardening.
Wooden pallets are versatile and economical materials for creating vertical gardens.
This setup is an easy way to start a vertical garden, offering plenty of room for creativity and flexibility.
Wall Planters and hanging baskets

WALL PLANTERS

HANGING FLOWER BASKETS
Hanging baskets and wall planters are excellent options for vertical gardening, especially when you have limited ground space and want to maximize vertical space.
Effective Use
Choose sturdy hanging baskets with solid hooks and brackets.
For wall planters, choose those with enough depth for roots to grow.
Install hooks or brackets on a sturdy exterior wall or balcony railing.
Securely anchor them to support the weight of the baskets and planters when filled with soil and plants.
Plants and Maintenance
Vibrant flowers like petunias, begonias, and geraniums work well in hanging baskets, creating colorful displays.
For wall planters, consider herbs like basil, thyme, and mint, which are excellent for cooking and thrive in vertical spaces.
Hanging baskets and wall planters may require frequent watering, especially in warm weather.
Ensure proper drainage and avoid overwatering.
Trim and prune as needed to maintain plant health.
Using hanging baskets and wall planters is a great way to maximize vertical space and add visual interest to your garden.
Old Ladders and PVC Pipes
Repurposing old ladders and PVC pipes can add unique character to your vertical garden while providing excellent support for climbing plants and vertical vegetable gardens.
Repurposing Old Ladders
Clean and repair any broken rungs or steps on the ladder.

You can hang small pots or planters from the rungs or use the ladder as a frame for climbing plants like pole beans, hardy kiwis, or morning glories. Or you can use the flat surfaces to hold unique potting vases.
Using PVC Pipes for Vertical Gardens
PVC pipes can be cut and arranged in various ways to create vertical vegetable gardens. Cut the pipes into sections and drill holes for plants.

Assemble the pipes vertically, securing them with brackets or fittings. In these structures, you can grow small vegetables like lettuce, spinach, and herbs.
Planting and Maintenance
Another option for ladders is to guide climbing plants along the frame, tying them as needed for support.
With PVC pipes, ensure each section has proper drainage and enough soil to support plant growth. Water regularly and monitor for pests.
Using old ladders and PVC pipes for vertical gardening creatively transforms everyday objects into functional garden structures.
(3) Building Your Own Vertical Garden
A LIVING WALL
Creating a living wall is an exciting project that can transform any dull space into a vibrant area of greenery.

GREEN PEA VEGETABLE GARDEN ALONG A WIRE FENCE
To begin with, you can construct the framework of the vertical garden using readily available materials.
Chicken wire or wire mesh is an excellent foundation, supporting climbing plants and holding soil or other growing mediums in place.
This setup maximizes the use of vertical space and creates a stunning focal point in any garden or indoor setting.
If you incorporate a variety of plants with different textures and colors, the living wall becomes not just a feature of utility but also one of artistic expression.
GUTTERS
DIY gutter gardens present another fantastic opportunity to cultivate a lush garden if you have limited ground space.
You can repurpose old gutters into planters and mount them on walls, along the edges of fences, or inside wooden frames.
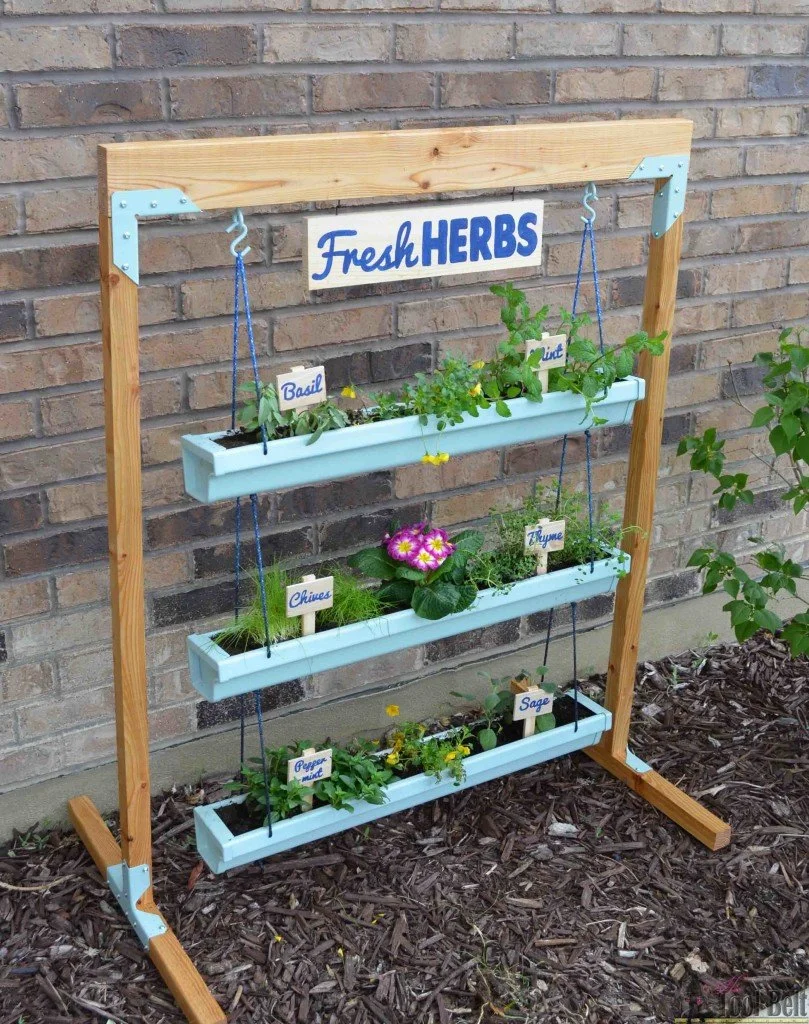
This type of garden is particularly suited for growing a range of edible plants and perennial vines, which can drape beautifully over the sides.
WINDOW BOXES
When planted at different heights, window box gardens can create a vertical tiered effect, producing a beautiful cascade of greenery and blooms.
Window boxes enhance visual interest and draw the eye upward, making them a practical and elegant use of space.




Both gutter gardens and window boxes are simple yet effective ways to engage in gardening without needing a traditional plot of land.
Both options offer abundant possibilities for growing a variety of plants in a compact, visually appealing small space.
(4) Tips for Maintaining a Vertical Garden
Watering Solutions
When it comes to vertical gardening, providing adequate water is crucial. But can be challenging due to the unique orientation and distribution of soil and plants.
Drip irrigation systems are highly beneficial. They deliver water directly to the roots of plants in a controlled and gradual manner.
This precision prevents water waste and ensures that each plant receives the moisture it needs without overwatering.

Water can quickly run off in vertical setups rather than soaking into the soil.
Frequent watering might be necessary, especially in warmer climates or peak summer months.
Vertical gardens can dry out faster than traditional gardens due to increased exposure to wind and sun.
The right Soil and Proper Drainage
Choosing the right type of soil and ensuring proper drainage are equally important factors in the success of a vertical garden.
Well-draining soil is essential because it allows water to flow through efficiently, preventing waterlogging, which can lead to root rot and fungal diseases.
This type of soil ensures that moisture is retained long enough to nourish the plants but not so long that it causes harm.
Incorporating drainage holes into the design of vertical planters is crucial.
These holes help to avoid excess water accumulation by allowing excess water to escape, thus maintaining the optimal moisture level for healthy plant growth.
The right soil and adequate drainage systems create a balanced vertical garden environment. This also helps minimize maintenance problems related to overwatering.
(5) Creative Uses and Inspirations
Inspirational Ideas for Small Spaces
In the realm of vertical gardening, creativity is vital, especially when dealing with limited space.
CREATIVE USES

One inventive approach involves using cinder blocks as modular planters.
These sturdy blocks can be stacked and arranged to form patterns, each compartment acting as a miniature garden bed for herbs, succulents, or small flowers.
The hollow centers of cinder blocks are ideal for planting, and their heavy weight makes them stable enough to support taller plants or to be stacked vertically.

Mason jars affixed to wooden boards or hung from secure hooks can create a striking visual display.
These jars can be used to cultivate a range of plants, from vibrant flowers to fresh herbs.
They allow you to enjoy a close-up of the plant’s growth, adding a charming touch to indoor spaces, balconies, or patios.
INSPIRATIONS
Examples of successful vertical gardens in city areas emphasize how they can transform confined spaces.
This is evidenced by the many successful gardens from around the globe. Here are just two examples.
A densely populated urban area in Belfast, Ireland, involves a community initiative in which residents transformed a neglected alley into a lush vertical garden, as seen in the following video.
This project beautified the space, fostered community engagement, and provided fresh produce to local families.
Another example of inspired spaces is the apartment complex Optima Sonoran Village in Scottsdale, Arizona.
The design detail of the exterior was crafted to mitigate the harsh aspects of the desert climate. The signature vertical landscape system with self-containing irrigation and drainage enables a varied palette of plants at every floor.

These examples highlight how vertical gardening can revolutionize the use of contained spaces, turning them into vibrant, productive, and enjoyable green areas.
The ease of setting up a vertical garden lies in its flexibility. You can tailor it to fit almost any space, whether a balcony, a bare wall, or even a small corner in an indoor area.
Try experimenting with different plants and vertical garden systems.
You can quickly begin cultivating a variety of plants with simple materials such as trellises, hanging planters, or modular wall systems.
Starting a vertical garden is a practical solution for gardening in small spaces and can be an enjoyable and rewarding experience.
(6) LEARN MORE / RELATED ARTICLES


RELATED ARTICLES

15 BENEFITS OF COMMUNITY GARDENING

PREPARING YOUR COMMUNITY GARDEN FOR DIFFERENT SEASONS

(7) FREE DOWNLOADS & PRINTABLES
FREE DOWNLOAD


How to Turn Waste into Nutrients for Your Garden Soil
Imagine turning your leftover banana peels, salad, and even the leaves you rake up in your yard into a superfood for your garden.
That’s composting. It improves soil health, helps plants grow, and conserves water.

Imagine turning your leftover banana peels, salad, and even the leaves you rake up in your yard into a superfood for your garden.
That’s composting. It improves soil health, helps plants grow, and conserves water.
It's a way to turn organic waste into nutrients that help your garden’s soil become more fertile and healthy.
Organic waste, like food scraps and yard waste, breaks down over time. In a compost pile, this process speeds up, resulting in a dark, crumbly substance that you mix into your garden’s soil.
This article will explore how to turn that waste into nutrients for your garden.
(1) Understanding Soil Nutrition
Soil isn't just dirt beneath your feet. It's a complex mixture that supports plant life by providing essential nutrients and a structure for roots to grow.
What are soil nutrients? Why are they vital for plant growth? What is the role of organic matter?
What Are Soil Nutrients?
Soil nutrients are the vitamins and minerals found in soil that plants need to grow, develop, and produce flowers and fruits.
These nutrients are divided into two main categories: macronutrients and micronutrients.
Macronutrients — including nitrogen (N), phosphorus (P), and potassium (K), are needed in larger amounts.
Nitrogen helps plants grow quickly and develop a vibrant green color by aiding in photosynthesis.
Phosphorus is crucial for the development of roots and flowers.
Potassium helps plants fight off diseases and aids in water absorption.
Micronutrients — such as iron, manganese, and zinc, are just as essential but are needed in smaller quantities.
These nutrients help with various functions, from fighting off diseases to improving the taste of fruits and vegetables.
Why Are Soil Nutrients Important for Plant Growth?
Without these essential elements, plants can't grow properly. They might be weak, produce fewer flowers and fruits, or even die.
Nutrients like nitrogen, phosphorus, and potassium support different aspects of plant growth, from root development to flowering and disease resistance. Ensuring your soil is rich in these nutrients gives your plants the best chance to thrive.
WHAT IS The Role of Organic Matter?
Organic matter is the secret ingredient that makes good soil great. It includes anything that was once living, such as leaves, grass clippings, and kitchen scraps.
When added to the soil, organic matter breaks down, improving soil structure and fertility in several ways.

First, organic matter helps soil hold onto moisture, acting like a sponge that keeps water available for plants. This is especially important during hot, dry periods when plants need more water to stay healthy.
Second, as organic matter decomposes, it releases nutrients back into the soil, providing a slow, steady food source for plants. This process also creates a better environment for beneficial microbes and worms that help break down organic material, aerate the soil, and keep it healthy.
Organic matter improves soil structure.
In clay soils, it helps create larger particles that improve drainage and prevent the soil from compacting.
In sandy soils, organic matter increases the soil's ability to retain water and nutrients that would otherwise wash away.
Organic matter enhances soil structure, ensuring roots can spread out easily, access water and nutrients, and securely anchor plants.
A little effort in understanding and improving soil nutrition can make a beautiful and bountiful garden.
(2) Types of Waste That Can Be Turned into Nutrients
Turning waste into garden nutrients gives a second chance to create life for items usually thrown away.
This process reduces the amount of garbage heading to landfills and also enriches the soil, making gardens thrive.
What types of waste can be transformed into garden nutrients? What not to compost?
Kitchen Scraps
A Treasure Trove for Composting
The kitchen is a goldmine for compostable materials.
Fruit and vegetable peels, coffee grounds, tea bags (without the staple), and egg shells make excellent additions to your compost pile.

ORGANIC LEFTOVERS. WASTE READY FOR RECYCLING AND COMPOSTING.
These items break down quickly and add valuable nitrogen to your compost, boosting the decomposition process.
** However, it's important to avoid adding meat, dairy, and oily foods to your compost. These items can attract unwanted pests and create unpleasant odors as they decompose.
Yard Waste
From the Garden Back to the Garden
Leaves, grass clippings, and small branches from your yard are also perfect for composting. These are rich in carbon, which balances the nitrogen from your kitchen scraps.

YARD WASTE — DEAD BROWN TWIGS AND PLANTS, NEWLY CLIPPED TREE BRANCHES
This balance is crucial for effective composting. Grass clippings add nitrogen to your compost, speeding up the decomposition process.
** However, make sure the grass hasn't been treated with pesticides, as these chemicals can harm the beneficial microbes in your compost and potentially damage your garden plants.
Certain Types of Paper
Not All Paper is Created Equal
Non-glossy paper, like newspapers, plain cardboard, and paper towels, can be added to your compost pile.

PAPER WASTE
These materials are high in carbon and help create air pockets in your compost, which are essential for aeration and speeding up the decomposition process.
** Avoid glossy or colored paper, as it may contain inks and chemicals that are not suitable for composting.
What Not to Compost
Keeping Your Compost Healthy
While many household and yard wastes can be composted, some items should never be put in the compost bin.
Meat, dairy products, and oily foods can attract pests and create bad odors.
Diseased plants or weeds that have gone to seed can spread diseases and unwanted growth in your garden.
Pet wastes, especially from dogs and cats, can contain harmful pathogens that are not safe for composting.
Finally, treated wood or sawdust from treated wood should not be composted due to the chemicals they may contain.

By understanding what can and cannot be composted, you can create a rich, nutrient-dense compost that will enrich your garden soil and help your plants thrive.
(3) The Basics of Composting
Composting is a natural recycling process that transforms organic material—stuff that comes from living things—into compost, a rich, earthy substance that gardens love.
This process not only reduces waste in landfills but also enriches the soil, making it a win-win for both the planet and gardeners.
What are the basics of composting? What ingredients do you need to start? How do you maintain the perfect balance for creating nutrient-rich compost?
The Ingredients of Composting
At its core, composting requires four main ingredients: greens, browns, water, and air.
Each plays a crucial role in composting, working together to break down organic material into compost.
Greens
These are nitrogen-rich materials that add essential nutrients to the compost.
They include kitchen scraps like fruit and vegetable peels, coffee grounds, and fresh grass clippings.
Greens help speed up the decomposition process, providing the energy microbes need to break down the waste.

Browns
Browns are carbon-rich materials that add bulk and help control moisture in the compost pile. They're like the carbohydrates of the composting world.
Browns include dried leaves, straw, wood chips, and shredded newspaper. They balance out the nitrogen in greens, preventing the compost from becoming too wet and smelly.
A good compost pile needs a mix of both green and brown scraps. You shouldn’t fill your entire garden with compost. Most of the ground should be soil. Mix in some compost to make the soil richer in nutrients.
Water
Moisture is essential for composting. It helps microbes thrive and break down materials. The compost pile should be moist but not too wet, similar to the feel of a wrung-out sponge.
If the compost is too dry, decomposition slows down. If it's too wet, it can become smelly and anaerobic (without oxygen), which isn't ideal for composting.
Air
Oxygen is needed for aerobic bacteria (the good kind) to break down the organic material. Turning the compost pile regularly introduces air, preventing it from becoming compacted. Adequate airflow ensures that the composting process remains efficient and odor-free.
Balancing the Elements
Finding the right balance between greens, browns, water, and air is the key to successful composting.
A common ratio recommended for beginners is about 2 parts browns to 1 part greens by volume. This balance helps maintain the right level of moisture and ensures that the pile has enough carbon and nitrogen for the microbes to do their work effectively.
If the compost pile is too wet or smells bad, adding more browns can help absorb excess moisture and reduce odors.
If the composting process is slow or the pile is too dry, adding more greens and a bit of water can reinvigorate the pile.
Regularly turning the compost pile is also crucial. It introduces air and helps maintain an even temperature throughout, speeding up the decomposition process.
The Magic of Composting
Composting is a natural recycling process that turns kitchen scraps and yard waste into a superfood for gardens, enriching the soil and helping plants grow stronger and healthier.
By understanding and managing the basics of composting—greens, browns, water, and air—you can transform waste into a valuable resource, contributing to a healthier planet and a more fruitful garden.
(4) Setting Up Your Composting System
Setting up a composting system benefits both you and the environment.
There are several methods of composting, each with its own advantages and challenges. Here are some popular methods and ways to learn how to start and maintain a simple compost pile or bin.
OPEN PILES
This is the simplest form of composting. You just start piling up your compostable materials in a designated spot in your yard.
Pros: It's easy to start and doesn't require any special equipment. It's also easy to turn and aerate.
Cons: It can look messy, attract pests, and is more exposed to the elements, which can affect the composting process.

BINS
Compost bins can be made from wood, wire, or plastic and help contain the compost in a neater way.

WIRE COMPOST BIN
Pros: Bins keep the compost contained, making it less likely to attract pests. They also retain heat and moisture better, speeding up the composting process.
Cons: Depending on the design, bins can be harder to aerate and might require more effort to turn the compost.

WOODEN COMPOST BIN

PLASTIC COMPOST BINS
TUMBLERS
These are sealed containers that you can rotate to mix your compost materials.

Pros: Tumblers make turning the compost easy and keep it well-aerated. They're also rodent-proof and can produce compost quickly.
Cons: They can be expensive, have limited capacity, and require a balance of materials to prevent becoming too wet or dry.
STARTING A SIMPLE COMPOST PILE OR BIN
Step 1: Choose Your Location and Container — For an open pile, select a dry, shady spot near a water source. For a bin, you can buy one or make your own from wood or wire.
Step 2: Start with Browns — Lay a thick layer of browns (like dry leaves or straw) at the bottom. This helps with drainage and aeration.
Step 3: Add Your Greens — Add a layer of greens (kitchen scraps, coffee grounds) on top of the browns. Remember the balance—about 2 parts browns to 1 part greens.
Step 4: Keep Adding Layers — Continue adding alternating layers of greens and browns. Water each layer lightly to keep the pile moist.
Step 5: Cover the Pile — If you're using an open pile, cover it with a tarp to retain moisture and heat.
MAINTAINING YOUR COMPOST
Every few weeks, turn your pile with a shovel or pitchfork to aerate it. This helps speed up the composting process.
Your compost should be moist but not soggy. If it's too dry, add water or more greens. If it's too wet, add more browns to absorb the excess moisture.
Your compost is ready when it's dark, crumbly, and smells earthy. It usually takes 4 to 6 months to fully decompose.
By following these steps and tips, you can successfully set up and maintain a composting system that turns waste into nutrient-rich compost for your garden.
Whether you choose an open pile, a bin, or a tumbler, composting is a rewarding process that benefits the environment and enhances your garden's health.
(5) Using Worms to Enhance Composting

What is Vermicomposting?
Vermicomposting is the process of using specific types of worms, usually red wigglers, to break down organic waste.
Instead of piling up yard waste and kitchen scraps and waiting for them to break down, vermicomposting uses worms to speed up the process and produce some seriously rich soil for your garden.
This method is perfect for people who don't have a lot of space for a big compost pile or who want to compost indoors.
How Worms Break Down Organic Material
Red wigglers feed on the decomposing organic material you provide, such as fruit and vegetable scraps, coffee grounds, and eggshells.
As they eat through this waste, they produce castings, which are basically worm poop. Despite sounding a bit gross, these castings are incredibly nutrient-rich and great for plant growth.
Setting Up a Worm Bin
Step 1: Choose Your Bin — You can buy a worm bin designed for vermicomposting or make your own from a plastic tote. The bin should be shallow rather than deep because red wigglers are surface dwellers and prefer not to burrow deep.
Step 2: Prepare the Bedding—Worms need a cozy environment to live in. Shredded newspaper, cardboard, coconut coir, peat moss, and dry leaves make excellent bedding.
Moisten the bedding so it's damp but not soaking wet, and fill the bin about three-quarters full.
Step 3: Add the Worms—You can buy red wigglers at a garden center or online. For a standard-sized bin, about 1,000 worms (or one pound) is a good start.
Gently spread the worms over the top of the bedding, and they'll burrow in on their own.
Step 4: Feed Your Worms — Start by adding small amounts of kitchen scraps on top of the bedding, then cover with more bedding to prevent odors and fruit flies. Feed your worms a balanced diet, avoiding too much citrus, onions, or meat and dairy products, which can create a smelly bin.
Maintaining Your Worm Bin
Keep It Comfy: Worms like a moist and dark environment. If the bin gets too dry, mist it with water. If it's too wet, add more dry bedding to soak up excess moisture.
Feed Regularly, But Not Too Much: Overfeeding can lead to odors and attract pests. If you see uneaten food, cut back on how much you're giving them.
Harvest the Castings: Every few months, it's time to harvest the castings.
Move all the material to one side of the bin and add fresh bedding (shredded newspaper, cardboard, coconut coir, peat moss, and dry leaves) and food to the other side.
The worms will migrate to the new food source, making it easier to scoop out the castings.
Vermicomposting is efficient and eco-friendly. Give it a try, and you will have nutrient-rich compost that's fantastic for your garden.
(6) Applying Compost to Your Garden
After you've spent time preserving and composting your kitchen scraps, how do you know when your compost is ready, and what's the best way to use it?
HOW DO YOU KNOW WHEN YOUR COMPOST IS READY?
Your compost is ready when it no longer looks like the scraps you put in. Instead, it should be dark, crumbly, and smell like the earth after rain.
Depending on how well you've managed your compost pile, this process can take anywhere from a few months to a year.
To harvest, you'll want to sift through your compost.
You can use a screen to separate any large pieces that haven't fully broken down yet. These can be put back into your compost bin to continue decomposing. What passes through the screen is your finished compost, ready to use in your garden.
WHAT IS THE BEST WAY TO USE COMPOST IN YOUR GARDEN?
The most common way to use compost is to mix it into garden soil. It can also be used as mulch around plants or made into compost tea.
As soil amendment: Before planting, spread a layer of compost over your garden beds and work it into the top few inches of soil. This adds essential nutrients and improves soil structure, making it easier for plant roots to grow.
As Mulch: Spread a layer of compost around the base of your plants, but be sure not to let it touch the plant stems directly. This layer helps retain moisture in the soil, suppresses weeds, and slowly adds nutrients to the soil as it continues to break down.
As Compost Tea: If you want to give your plants a liquid treat, you can make compost tea. Mix some compost with water and let it steep for a few days, stirring occasionally. Then, strain the liquid and use it to water your plants. It's a gentle, nutrient-rich solution that plants absorb quickly.
Benefits of Compost for Soil Health and Plant Growth
Compost is packed with benefits for your garden. Here are just a few:
Improves Soil Structure: Compost helps break up heavy clay soils, making them easier for plant roots to penetrate. It also helps sandy soils retain water better.
Adds Nutrients: Compost slowly releases a wide range of essential nutrients that plants need to grow, reducing the need for chemical fertilizers.
Encourages Beneficial Microbes: The organic matter in compost supports the growth of beneficial bacteria and fungi that help plants absorb nutrients and fight off diseases.
Enhances Water Retention: Compost helps soil hold onto water, reducing the need for frequent watering and protecting plants during dry spells.
Using compost in your garden is a simple way to boost plant health and yield, improve soil structure, and reduce your environmental footprint.
Whether you're growing vegetables and flowers or just maintaining your lawn, compost can greatly improve the health and beauty of your lawn or garden.
(7) Common Composting Problems
Composting recycles waste into something magical that helps plants grow. But sometimes, in composting, challenges can come in the form of bad odors, unwanted pests, or compost that won't break down.
But don’t worry. Most of these issues have simple solutions. Here are some common composting problems and how to fix them, keeping your compost healthy and productive.
Bad Odors
If your compost pile starts smelling more like a trash can than a garden helper, it's a sign something's off balance.
Bad odors are usually caused by too much moisture and not enough air. This can happen if you have too many greens (like kitchen scraps) and not enough browns (like dried leaves or straw).
Solution: Add more browns to your pile to soak up excess moisture and help introduce air. Turning your compost pile more frequently can also help by adding oxygen and distributing the materials more evenly.
Pests
Unwanted visitors like rodents and insects might be attracted to your compost pile if it contains things they like to eat, such as meat, dairy, or oily foods. These items can also cause odors, drawing even more pests.
Solution: Keep meat, dairy, and oily foods out of your compost. Make sure your compost bin has a tight-fitting lid or is enclosed to keep pests out. If you're composting in an open pile, cover food scraps with a thick layer of browns to hide them from pests.
Slow Decomposition
Sometimes, it feels like your compost pile just isn't breaking down, no matter how long you wait. Slow decomposition can be caused by a lack of moisture, not enough nitrogen-rich greens, or insufficient turning.
Solution: Make sure your compost pile is moist but not soggy. If it's too dry, add water and mix it in. If your pile has too many browns, add more greens to provide nitrogen, which helps speed up decomposition. Turning your pile regularly introduces air and helps distribute moisture and materials, encouraging faster breakdown.
Too Much Heat
Compost piles generate heat as part of the decomposition process, but too much heat can kill the beneficial microbes that break down the organic material. If your compost pile is too hot, it might be too large or have too much nitrogen.
Solution: If your pile is very large, consider dividing it into smaller piles to help regulate the temperature. If the pile is too rich in nitrogen, add more browns to balance it out.
Maintaining a Healthy Composting System
Composting is an ongoing process that requires a bit of attention and care to keep it running smoothly. You can maintain a healthy composting system by addressing common issues like bad odors, pests, slow decomposition, and too much heat.
Remember, the key to successful composting is balance—balancing greens and browns, moisture and air, and feeding and turning.
With these tips, you can keep your compost healthy and productive, turning kitchen scraps and yard waste into gold for your garden.
LEARN MORE


RELATED ARTICLES


FREEBIES

10 Easy Steps to Build a Home Library for Your Kids
A home library can help foster a love of books in your child. It instills in children the value of books and the endless adventures books offer while creating lasting memories.

A home library can help foster a love of books in your child. It instills in children the value of books and the endless adventures books offer while building lasting memories.
Helping children develop a love of reading at an early age is crucial. It gives them a foundation for lifelong learning and curiosity. It equips them with the tools to develop a well-informed and open mind.
Creating a home library allows you and your children to bond over shared interests.
You will have a special space that reflects the unique personalities within your family.
- 1. Determine the Location
- 2. Assess Your Space and Needs
- 3. Set a Budget (Free Books)
- 4. Involve Your Kids in the Planning Process
- 5. Choose Comfortable Furniture
- 6. Acquire Shelving and Storage
- 7. Curate Your Book Collection
- 8. Organize Your Books
- 9. Decorate and Personalize the Space
- 10.Create a Library System
- Learn More
(1) Determine the Location
The first step is to find the best location in your home. You’re looking for an area that will become a sanctuary for your child’s imagination and learning. Also, it is an ideal place that the whole family can enjoy.
Consider these three things: the space, the lighting, and how accessible the location is.
Space
How much space do you have available?
Your library does not need to take up an entire room.

Even a small corner will do.
An unused nook can be transformed into a cozy reading space.

The key is to have enough room for a bookshelf and comfortable seating.
LIGHTING
Good lighting is essential. An area near windows where natural light is available is perfect. If not, consider adding warm artificial lighting. You want to create a welcoming place for reading without straining the eyes.
ACCESSIBILITY
The library should be placed in a common area that is easily accessible to your children. A living room or spacious hallway can be very inviting.


The goal is to make the library a fundamental part of your home so that grabbing a book will be natural and effortless.
Create an inviting space for children to explore, imagine, and grow.
With thoughtful consideration, you can turn even the smallest space into a vibrant hub of learning and creativity for your family.
(2) ASSESS YOUR SPACE AND NEEDS
Before you start buying bookshelves or collecting books, evaluate what you have and what you'll need.
This step is crucial in making your home library functional and enjoyable for your family.
YOUR COLLECTION VS. SPACE
Take stock of the books you own and want to keep in your library.

What are your children's age ranges and interests? You want the collection to be relevant and engaging for them.
Then, look at the available space in your home where you plan to set up the library.
Is it a small corner in the living room, an unused closet, or perhaps a section of your child's bedroom?
Understanding the size of your collection and the space you must work with will help you make knowledgeable decisions about storage and organization.
flexible storage solutions
As your children grow, so will their interests and the books they love. In the long run, opting for flexible storage solutions can save you time and money.
Here are some suggestions:
MODULAR SHELVING
These units can be easily adjusted or expanded. As the collection grows, you can add more shelves. They can be customized to fit your space and storage needs.
BOOK BINS AND BASKETS

For younger children, low bins and baskets can be more accessible than traditional bookshelves.
They're easy to move around, making book selection fun and easy for little hands. As your collection expands, you can add more bins without needing a lot of extra space.
WALL-MOUNTED SHELVES
If your floor space is limited, consider using wall-mounted shelves.

Wall-mounted shelves take up less room and can be placed at different heights to accommodate books of various sizes.
Plus, they offer the added benefit of keeping books within easy reach of children and out of the way.
MULTI-FUNCTIONAL FURNITURE
Look for furniture that can serve double duty. For example, benches with built-in storage or beds with shelves underneath can give you extra storage for books without needing extra space.

An under-bed storage drawer on wheels can be an easy and accessible location to start a small home library for children.
Or a great place for children to keep books they are currently reading.
The goal is to create a home library that is both practical and inviting.
Carefully consider the size of your book collection and your available space.
Use flexible storage, so your library can grow with your family.
This will ensure that your home library will remain a cherished space for years to come.
(3) Set a Budget
Creating a home library for your kids is an investment in their future. But as with any project, starting with a plan is best.
Setting a budget for books and furnishings is essential. This will ensure that you can build a wonderful space without overspending.
WHY YOU NEED A BUDGET
Having a budget helps you prioritize your spending, allowing you to focus on the necessary books and materials for your home library.
Besides books, you must consider storage, such as shelves or containers, and seating.
A budget will help you stay on track and prevent impulse buying.
Here’s how to maximize your budget with cost-effective solutions and resources.
WHERE TO FIND FREE BOOKS
MONKEY PEN - Free children's eBooks for kids of all ages.
DOLLY PARTON’S IMAGINATION LIBRARY
Country singer Dolly Parton founded Imagination Library, a program that offers free books to children between 0 and 5.
The program started in 1995 and has grown to send out over 1 million free books monthly. To find out if the program is available in your community, enter your zip code.
BARNES & NOBLE - - FREE KIDS EBOOKS
Barnes & Noble has free children’s e-books to download onto a Kindle or other reading devices.

Little Free Libraries are small boxes that contain books that can be taken or shared at no cost. Volunteers have installed these book-sharing boxes in over 90,000 locations near sidewalks and other public areas where people tend to walk by. The objective of this initiative is to provide free access to books 24/7.
This site lists free books available for a limited time on Amazon, and you can sort by categories such as “Teen & Young Adult,” “Children’s eBooks,” and “Comics & Graphic Novels.” Before downloading, check that the book is accessible by ensuring the price is listed as “$0.00” or filter through “Freebies.”
Project Gutenberg is trying to get the classics to people for free. They have kids’ books for all ages.
If your child is between 5 and 9, you can get them a FREE subscription to LEGO Life Magazine. This is great for comic book fans. The magazine is delivered directly to your home five times a year, and shipping is free!
Your Local Library
Sign up for a library card to access hundreds of books. Furthermore, if the book you want to read is unavailable at your library, an interlibrary loan can help you get it.
COST-EFFECTIVE SOLUTIONS
Setting a budget for your home library is not about limiting what you can do; it’s about making smart choices that maximize your resources.
LIBRARY SALES AND BOOK FAIRS
Keep an eye out for library sales and book fairs. They can be great places to find book deals.

Public libraries often sell donated books or older copies from their collection to make room for new titles. Book fairs, especially those at schools, can also offer discounted prices.
TRADE OR BORROW BOOKS
You can borrow books from your local library to test titles before adding them to your collection. You can also consider setting up a book exchange or book swap with friends, family, or neighbors.
These are cost-effective ways to refresh your library without spending money.
BUY USED BOOKS
An excellent way to stretch your budget is by purchasing used books.
Thrift stores, garage or yard sales, and online marketplaces are treasure troves of affordable books. You'll often find high-quality, gently used books at a fraction of the cost of new ones.
DIY FURNITURE
If you're handy, making your own bookshelves or reading nook furniture can save you a lot of money.
Plenty of online tutorials can guide you through the process, allowing you to customize the furniture to fit your space perfectly.
Pallets, crates, and repurposed materials can be transformed into unique, functional pieces for your library.
SHOP SALES AND DISCOUNTS
For furnishings, watch for sales at furniture stores, online retailers, and second-hand shops.
End-of-season sales, clearance items, and discount outlets offer furniture at reduced prices, helping you furnish your reading nook on a budget.
BE CREATIVE WITH DECOR
Decorating your home library doesn't have to be expensive.

Use your children's artwork, fabric scraps, and inexpensive frames to create a warm, personalized space.
DIY decor projects can also be a fun activity to do together, adding a special touch to the library.
When setting a budget for your home library, keep these things in mind:
It’s not about limiting what you can do. It’s about making intelligent choices that will maximize your resources.
If you are mindful of your budget, you can create a beautiful, functional space without overspending.
Remember, the value of a home library isn’t measured in dollars but in the joy and knowledge it brings to your family.
(4) Involve Your Kids in the Planning Process
One of the most effective strategies for creating a home library that genuinely resonates with your children is to involve them in the planning process.
This will make the project more enjoyable for everyone.
Explore why including your kids in the decision-making process is beneficial and how to turn it into a fun and educational activity.
Benefits of Inclusion
OWNERSHIP AND PRIDE
When children have a say in creating their home library, they develop a sense of ownership and pride in the space.
This personal investment encourages them to use the library more often, as it reflects their interests and creativity.
BOOSTS DECISION-MAKING SKILLS
Participating in the planning process helps children practice making decisions and expressing their preferences.

Whether they choose which books to include or decide on the color scheme, each choice builds their confidence and decision-making abilities.
ENHANCES CREATIVITY
Involving kids in the design of their home library allows them to tap into their creativity.
From selecting bookshelves to brainstorming decorative themes, the planning process becomes a canvas for their imagination.
ENCOURAGES READING
By actively participating in creating their home library, children become more excited about using it.
This anticipation can naturally lead to an increased interest in reading as they look forward to spending time in a space they helped design.
Making It Fun and Educational
BOOK SELECTION PARTY
Turn the process of selecting books for the library into a celebration.
Have a "book selection party" where each child can choose books they're excited to read.
You can visit a bookstore together or browse online libraries, discussing what makes a book interesting and worth including in your collection.

DECORATING PROJECTS
Engage your children in DIY decorating projects for the library.
Some Ideas:
Making Bookmarks
Painting Bookends
Creating Artwork to Hang on the Walls
THEME VOTING
If you're considering a theme for your home library, such as space exploration or a jungle adventure, let your kids vote on their favorite idea.
This can extend into researching decorations and even themed books, making planning an educational journey.
ORGANIZATIONAL GAMES
Make library organization a game.
You could challenge your children to determine the best way to categorize the books or who can find the most creative storage solutions.
This would introduce children to the concept of organization while keeping it light and enjoyable.
STORYTELLING SESSIONS
Once the library is set up, celebrate by having a storytelling session where each family member reads their favorite book or tells a story.
This reinforces the idea that the library is a communal space for sharing stories and ideas.
Involving your kids in the planning process of your home library is more than just a way to ensure the space meets their needs.
It's an opportunity to bond, learn, and grow together.
You are building a physical space as a family and nurturing a love for reading and creativity that will last a lifetime.
(5) Choose Comfortable Furniture
When setting up a home library for your kids, one of the most crucial elements to consider is the furniture, especially the seating.
The right furniture adds to the appeal of your library but also plays a significant role in making the space cozy, inviting, and conducive to reading for extended periods.
Here’s how to choose child-friendly seating and create the perfect reading nook for your young readers.
SELECTING CHILD-FRIENDLY SEATING
The key to selecting seating for your home library is comfort, durability, and size.
Children are more likely to spend time reading if they have a comfortable place to sit that’s just their size.
Consider these options:
BEAN BAGS
Bean bags are popular for kids’ reading areas because they’re soft, lightweight, and easy to move around.
They come in various sizes and colors, and you can match them with the room’s decor.
They are a fun and comfortable seating option for kids.

FLOOR CUSHIONS
Large floor cushions are another excellent option for a children's reading nook.
They can create a casual and comfortable environment where kids can relax, lie down, or find their perfect reading position. Plus, they're ideal for storytime with multiple children.
MINI ARMCHAIRS AND SOFAS
Child-sized armchairs and sofas mimic the comfort of adult furniture but are designed to fit smaller bodies.
These pieces of furniture can make children feel grown-up and special, encouraging them to use the space regularly.
READING BENCHES
Benches with cushioned seats and storage underneath for books combine functionality and comfort.
They can be a great space-saving solution, providing a place to sit and additional storage for your growing book collection.
CREATING A COZY AND INVITING READING ENVIRONMENT
Beyond just choosing the right furniture, creating a cozy atmosphere is about paying attention to the details that make the space welcoming:
SOFT LIGHTING
Good lighting is essential for reading, but it should also contribute to the coziness of the space.
Soft, warm lights, such as table lamps or string lights, can make the reading nook feel inviting and comfortable.
THROW BLANKETS AND PILLOWS
Adding soft throw blankets and pillows can make the seating even more comfortable, allowing kids to snuggle up with a good book.

Choose materials and patterns that invite touch and relaxation.
PERSONAL TOUCHES
Let your kids choose some decor or accessories for the reading nook, like the color of the bean bags or the design of the cushions.
Personal touches make the space feel like it's truly theirs, which can motivate them to spend more time reading.
The goal of choosing comfortable furniture and creating a cozy reading environment is to make the home library a place where children want to be.
(6) Acquire Shelving and Storage
When creating a home library that sparks joy and curiosity in young readers, selecting suitable shelving and storage solutions is as crucial as choosing the books themselves.
The ideal shelving should be functional, allowing easy access and organization of books.
Shelving should be safe for kids, minimizing the risk of accidents.
Moreover, for those who enjoy a touch of creativity, there are numerous DIY options to personalize your library setup, making it a unique space that reflects your child's personality and interests.
Options for Bookshelves and Storage Solutions
WALL-MOUNTED SHELVES
These are a great space-saving solution that keeps books at eye level for children.
When installing, ensure they are securely fastened to the wall to prevent tipping.
Wall-mounted shelves can be arranged in various patterns, making them an attractive feature.
LOW-LYING BOOKCASES
Bookcases low to the ground are perfect for children, allowing them easy access to their favorite reads.
Look for bookcases with a sturdy base and, if possible, anchor them to the wall for added safety.
Some bookcases come with colorful bins, which can be labeled by genre, author, or reading level, helping to organize the books while making them appealing to young readers.
FORWARD-FACING BOOKSHELVES
These shelves display books with their covers facing out, making it easier for children to choose what they want to read.
This type of shelving encourages exploration and can significantly increase a child's interest in reading by making book selection exciting and visually appealing.
Creative DIY Options for Personalized Library Setups
REPURPOSED CRATES OR PALLETS
Wooden crates or pallets can be painted and secured to create unique, rustic bookshelves.
This option allows you to customize the size and shape of your shelving to fit any space perfectly. Plus, it's an eco-friendly choice that adds character to your home library.
RAIN GUTTER SHELVES
An innovative and cost-effective solution, rain gutters can be mounted on walls as bookshelves. They offer a forward-facing display and can be installed at various heights, making them accessible for children of all ages.
Rain gutter shelves are easy to clean and provide a unique look to your library.
FLOATING BOOK LEDGES
Similar to picture ledges, these narrow shelves allow books to be displayed cover out and placed in rows to create a wall of books.
They're sleek, don't take up much space, and can be customized to fit the length of any wall.
SHELVING SAFETY CONSIDERATIONS


Incorporating creative shelving and storage solutions into your home library optimizes the space for functionality and safety and adds a personal touch that can make reading more appealing to children.
By involving your kids in the selection or creation process, you can ensure the library becomes a space they cherish and love to explore.
(7) CURATE YOUR BOOK COLLECTION
Building your home library is more than just gathering lots of books.
Select a diverse range of books that reflect your children's interests, challenges, and learning opportunities.
Include a mix of genres, levels, and formats.
A thoughtfully selected assortment of books can ignite curiosity and support your child's educational journey.
Here's how to curate a diverse and enriching book collection for your home library.
INCORPORATE VARIOUS GENRES
Just like adults, children have different tastes in literature.

A mix of genres, such as fantasy, science fiction, mystery, historical fiction, and nonfiction, ensures that there's something for everyone.
CHOOSE BOOKS AT MULTIPLE READING LEVELS
Children's reading abilities vary widely, even within the same age group.
Begin with simple picture books or board books for younger readers. Gradually include more complex texts such as chapter books as their skills develop.
This approach allows children to find books that match their abilities while offering challenges as they improve.
INCLUDE DIVERSE PERSPECTIVES AND CULTURES
Books are a window to the world, offering insights into different lives, cultures, and experiences.
Including books that feature diverse characters and settings promotes empathy and understanding.
CONSIDER DIFFERENT FORMATS
Beyond traditional print books, consider adding audiobooks, e-books, graphic novels, and interactive books to your collection.
These formats can appeal to reluctant readers or those who learn better through auditory or visual means.
They also add variety to the reading experience, catering to different preferences and situations, like long car rides or quiet time before bed.
Curating your book collection is an ongoing process that involves thoughtful consideration of your child's interests, abilities, and the diverse world.
(8) ORGANIZE YOUR BOOKS
Once you've collected a diverse set of books for your home library, the next step is organizing them so that your children can easily find what they're looking for.
Make your organization system fun, engaging, and understandable for your children.
A well-organized library encourages children to explore and read more.
Here are some ideas:
SORT BY GENRE OR THEME
One of the simplest ways to organize books is by genre or theme.
This could mean having separate sections for fiction, non-fiction, fantasy, science, history, and so on.
You might categorize books for younger children based on themes like animals, space, fairy tales, or adventures.
Labeling each section with colorful, easy-to-read signs can help children navigate the library and discover books that match their current interests.
ORGANIZE BY READING LEVEL
Arranging books by reading level can be particularly helpful for families with children of different ages.
This method allows kids to easily find books that match their reading ability, encouraging independence and confidence in their reading choices.
To indicate different levels, you can use a simple system, such as color-coded stickers on the book spine.
ALPHABETIZE BY AUTHOR OR TITLE
For older children, organizing books alphabetically by author or title introduces them to the conventional system used in most libraries and bookstores.
This method can help children practice alphabetical order and research skills while searching for specific books.
CREATE PERSONALIZED BOOK BINS
For younger children, personalized book bins with their names and favorite themes or characters can make the library more engaging.


Each child can have a bin for their current reads or favorites, making them feel a special connection to the library.
CREATE A BOOK CHECKOUT SYSTEM
Introduce a playful checkout system with a library card for each child and a logbook to record their reading.
This will make the library feel more official and teach responsibility and tracking skills.
ROTATE FEATURED BOOKS
Set up a "featured books" shelf or display area to rotate selections based on themes, seasons, or your children's interests.
Remember, the goal is to create an organized space that invites exploration and discovery.
(9) DECORATE AND PERSONALIZE THE SPACE
After you've set up the shelving and organized the books, the next exciting step in creating your home library is to decorate and personalize the space.
Decorate the library area to reflect your child's interests and personality.
Here are suggestions for decorating your library.
Use Theme-Based Decorations
Consider decorating the library area based on a theme that your child loves.
Whether it's dinosaurs, outer space, fairy tales, or under the sea, a themed library can spark imagination and make reading time an adventure.
Use wall decals, posters, and themed accessories to bring the theme to life.
Incorporate Your Child's Artwork
There's nothing more personal than artwork created by your child.
Framing and displaying their drawings or paintings in the library personalizes the space and makes your child feel proud and valued.
Choose Bright, Cheerful Colors
The library's color scheme can significantly influence its mood. Opt for bright and cheerful colors that stimulate energy and creativity.
You can involve your child in choosing the paint colors, colorful furniture, and accessories.
Create a Comfortable Reading Nook
Designate a cozy reading nook within the library that invites your child to curl up with a good book.
This could be a corner with a soft rug, a comfortable chair or beanbag, and plenty of pillows.
Adding a canopy or tent can make the nook feel like a private retreat.
USE PERSONALIZED ACCESSORIES
Personalize the space with accessories that reflect your child's interests and personality.
This could include bookends in the shape of their favorite animals, a personalized name sign, or a bulletin board where they can pin photos, quotes from their favorite books, and reading goals.
Creating a personalized and decorated library makes the space feel special.
(10) CREATE A LIBRARY SYSTEM
Implementing a library system in your home library is a fantastic way to teach your child responsibility and organizational skills.
Here's how to set up a simple system to track favorite reads and future book additions.
Use a Library Card
Create personalized library cards for each family member. Design these cards together, making the process a creative activity.
These cards can be used to check out books from the home library, just like in public or school libraries.
Book Return Box
Designate a special box or bin as the "book return" spot.
After finishing a book, your child can place it in this box before officially logging it as returned. This mimics returning books at a public library and helps keep the library organized.
Favorites Journal
Please encourage your child to keep a journal of their favorite reads.
They can write down what they liked about each book, rate them, and even draw pictures related to the story.
Moreover, tracking favorite reads through a journal allows children to reflect on their reading, reinforcing comprehension and critical thinking.
It also provides an excellent opportunity for family discussions about books, characters, and themes, enhancing the educational value of reading.
This journal becomes a cherished keepsake that highlights their reading journey.
Wish List Board
Create a wish list board, either physical or digital, where your child can add books they're interested in reading in the future.
This can be based on recommendations from friends, teachers, or books they've come across in other libraries.
Involving them in selecting new books for the wish list gives them a voice in the library's growth.
By implementing these simple strategies, you'll organize your book collection and foster in your child a sense of responsibility, curiosity, and love for learning.
LEARN MORE ABOUT IT


Preparing Your Community Garden for Different Seasons
Community gardens are vibrant, shared spaces where people come together to cultivate not only plants but also relationships and a sense of community.
Gardens require detailed care and attention.
This article will help you prepare your community garden, making it a flourishing, productive space all year round.

Community gardens are more than just plots of land where you grow vegetables and flowers.
They are vibrant, shared spaces where people come together to cultivate not only plants but also relationships and a sense of community.
As they weather each season, gardens require detailed care and attention.
This article will help you prepare your community garden, making it a flourishing, productive space all year round.
HOW TO PREPARE YOUR GARDEN FOR SPRING
Spring signals a new beginning.
Springtime garden preparation is vital because it lays the groundwork for a successful gardening year.
The cold and often harsh winter conditions can leave your garden in a state of dormancy. The inactivity can result in compacted soil, leftover plant debris, and possibly damaged garden structures that need repairing.
Addressing these issues is the first step in spring preparation.
This strategy not only involves routine maintenance but it encompasses rejuvenating and revitalizing your garden.

1. Assess winter DamagE
Start by conducting a thorough walkthrough of the entire garden when the snow melts, and the ground is no longer frozen. Look for signs of damage caused by winter weather.
Identify Common Winter Damage
Broken Fences and Structures: Check for any fences that might have been damaged by heavy snow or strong winds. Look at other structures like trellises, arbors, or raised beds to see if they’ve been affected.
Fallen Branches: Heavy snow and ice can cause branches to break and fall. These look messy and can pose a hazard and potentially damage underlying plants.
Overturned Pots and Planters: Pots and planters can be knocked over by strong winds or the weight of snow. Some might be broken or damaged and need replacing.
Signs of Plant Distress: Some plants might show signs of winter burn from cold winds or have been affected by frost heave, where the soil has pushed the plant up and out of the ground.
Create a Repair “To-Do List”
Make a detailed list once you’ve noted all the areas that need attention. This list will be your guide to getting your garden back in shape.
Prioritize the repairs based on what needs immediate attention. Safety issues like broken branches or unstable structures should be at the top of your list.
Organize a Community Effort
Schedule a workday to tackle these repairs together.
Assign tasks based on the list you've made. Some in your community group may be skilled at mending fences, while others can focus on clearing debris or fixing planters.
Working together makes the job easier and fosters a sense of community and responsibility for your shared garden site.
Reflect and Learn
As you repair and clean up, take the time to reflect on what changes might prevent similar damage in the future. Some structures may need to be reinforced, or certain plants need extra protection.
Consider keeping a garden journal to note what happened and what was done. This record can be beneficial for future planning and preparation.
By thoroughly assessing winter damage and organizing a collective effort to address it, you're not only repairing but also setting the stage for a vibrant and thriving garden in the coming months.
This proactive strategy ensures that your garden remains a beautiful and safe space for everyone to enjoy.
2. AERATE AND ENRICH THE SOIL
Healthy soil is the foundation of a healthy garden.
The soil must be aerated and enriched after months of lying stagnant under snow or cold, wet conditions.
Spring is the perfect time to prepare your soil for the upcoming growing season.
Soil is much more than just dirt. It is a living, breathing foundation that nourishes and supports your garden plants.
After enduring the harsh winter months, your garden's soil isn't ready to support new life. It needs your help to wake up and prepare for the busy growing season ahead.
Here's how you can prepare your soil in early spring, ensuring it's ready to provide a healthy environment for your plants to flourish.
What is Aeration? Why Aerate?
Over the winter, soil can become compacted. It's too tight and doesn't allow air, water, or nutrients to move freely. Aeration is like giving your soil a deep breath of fresh air, making it easier for roots to spread and grow.
This involves tilling or turning the soil to introduce air and improve drainage, which is vital for healthy root growth. Be careful not to disturb any dormant perennial plants or emerging bulbs.
How to Aerate

Use a garden fork or specialized aerator to gently turn and loosen the soil.
This process introduces air into the soil and improves drainage, which is crucial for healthy root growth.
While doing this, be careful around areas where you know you have dormant perennials or bulbs just starting to poke through the ground. You don't want to damage these future blooms accidentally.
Enriching the Soil with Organic Matter
Just like you need a balanced diet to be healthy, your plants need a mix of nutrients to grow.
Over the winter, the soil can lose many of its essential nutrients. Adding organic materials returns vital nutrients to the soil and improves its structure, making it easier for roots to grow.
How to Add Organic Matter
Spread a layer of compost, aged manure, or leaf mold over your garden beds. Then, gently work it into the top layer of soil.
Not only does this add nutrients, but it also helps the soil retain moisture and resist compaction, creating an ideal environment for plant roots.
Long-Term Garden Health
Nutrient-rich soil supports everything from the tiniest microorganisms to the largest plants in your garden, creating a vibrant ecosystem where everything can thrive.
Taking the time to prepare your soil in the spring pays off throughout the growing season.
Healthy soil leads to healthy plants, which are more resistant to pests and diseases.
Plus, as organic matter breaks down, it continues to add nutrients to the soil, improving its quality year after year.
Preparing your soil in the spring is a critical step in creating a healthy, productive garden.
By aerating garden soil and enriching it with organic matter, you're preparing for this year's plants. But you're also investing in your garden's long-term health and vitality.
3. Create a Planting Strategy
Now is the time to start planting.
Consider the climate and soil type of your area when choosing plants.
Hardy vegetables like peas, spinach, and lettuce can be planted early in the spring as they can tolerate cooler temperatures.
Starting some plants indoors in seed trays can give them a head start and protect them from late frosts.
Examples of Community Garden Planting Strategies
Here are three planting strategies (click the arrows below) that can help your community garden flourish — Companion Gardening, Succession Planting, and Vertical Gardening.


Companion Planting
Companion planting is like setting up a good neighborhood for your plants. It's about placing plants next to each other that can help one another grow.
This strategy maximizes space and promotes a healthy, diverse ecosystem.
Planting flowering herbs like dill, fennel, and lavender near crops that require pollination (like squash and tomatoes) can attract beneficial insects, including bees and butterflies.
You can plan with fellow gardeners to ensure a variety of beneficial plant relationships. This encourages collaboration and learning from each other's experiences.
Succession Planting
Succession planting is about ensuring there's always something growing in your garden. Instead of planting all at once, you stagger planting times or plant different crops in the same space throughout the growing season.
For example, after harvesting early-season lettuce, you can plant a crop of beans in the same spot. This keeps the garden productive and prevents soil depletion.
In a community garden, you can coordinate with fellow gardeners to ensure a continuous supply of crops. This keeps the garden looking full and vibrant and provides a steady supply of different produce for everyone to enjoy.
Vertical Gardening
Community gardens often have limited space, and vertical gardening (growing plants upwards instead of outwards) is a great way to make the most of it.
Many vegetables and fruits are well-suited to vertical gardening, including tomatoes, peas, beans, cucumbers, and certain kinds of squash and melons.
Climbing flowers like morning glories or clematis can also add beauty and attract pollinators.
Vertical gardening can make harvesting more manageable and create shaded areas for plants that prefer less sun.
By implementing these strategies, your community garden can become a more productive, efficient, and enjoyable space.
Remember, the key to a thriving community garden is communication and cooperation.
Discuss these strategies with your fellow gardeners, plan together, and watch as your collective efforts lead to a thriving garden in which everyone can take pride.
BEST GARDENING TOOLS FOR SPRING

Hand Trowel — A small, handheld tool with a pointed, scoop-shaped metal blade and a comfortable handle.
It's used for digging small holes, transplanting seedlings, and planting bulbs.

They are used for trimming and shaping plants, removing dead foliage, and cutting back overgrown branches.

A garden fork is a long-handled tool with four flat, thick, and sturdy tines.
It's used for turning soil, aerating, and breaking up hard ground, making it ideal for preparing garden beds in the spring.

A Hori-Hori knife is a versatile Japanese gardening tool that acts as both a knife and a trowel.

A wheelbarrow or garden cart is indispensable for efficiently moving soil, compost, plants, and other materials around your garden.

A soil tester is a valuable device that helps you understand the conditions of your soil, including pH, moisture, light, and nutrient levels.
HOW TO PREPARE YOUR GARDEN FOR SUMMER
Summer is the peak growing season in the garden. It’s a time of lush greenery, vibrant flowers, and bountiful harvests. It also requires diligent care and maintenance.
Watering and mulching are essential practices for a healthy garden.
During the hot summer, your garden needs extra care to stay lush and productive. Two essential practices to keep your garden thriving are proper watering and mulching.
Here’s a detailed look at why these practices are crucial and how to do them effectively.
1. WATERING YOUR SUMMER GARDEN
Regular watering is crucial during the summer months.
Water deeply and less frequently to encourage deep root growth.
Mulching around your plants with organic material like straw or wood chips can help retain soil moisture and suppress weeds.
Why Regular Watering is Important
Plants are mostly water and can get thirsty quickly in the summer heat. Regular watering ensures plants have the moisture they need to grow strong and healthy. It’s especially critical during prolonged dry spells or heat waves.
Deep Watering Method
Instead of giving your plants a little water daily, watering them deeply and less frequently is better. This means giving the soil a good soaking so water reaches deep down to the roots.
Deep watering encourages plants to grow deeper roots, making them more resilient and better able to find water.
Best Time to Water
The ideal time to water your garden is early morning before the day’s heat. This gives the plants time to absorb the water before it evaporates.
Evening watering is also an option, though it’s better to avoid late-night watering as it can promote mold and other plant diseases.
2. Mulching Your SUMMER Garden
What is Mulch, and Why Use It?
Mulch is a layer of material spread over the soil surface.
Organic mulches like straw, wood chips, or grass clippings make your garden look tidy and have several plant benefits.
Retaining Moisture
Mulch helps the soil retain moisture by reducing evaporation. This means you’ll need to water less frequently, and your plants will stay hydrated even on hot days.
A layer of mulch can prevent weeds from taking over your garden. Weeds compete with your plants for water and nutrients, so keeping them at bay helps them succeed.
Adding Nutrients
As organic mulches break down, they add nutrients back into the soil. This helps create a rich, healthy foundation for your plants.
How to Mulch
Spread a layer of mulch around your plants, covering the soil but not touching the plant stems. A layer about 2-3 inches thick is usually ideal.
Be sure to replenish the mulch as it breaks down over the season.
Incorporating regular, deep watering and effective mulching into your garden care routine, you’re helping your garden look better and create a healthier environment for your plants to grow.
These practices help ensure your garden remains a vibrant, productive space all summer.
3. MANAGINGS PESTS
Summer gardens are vibrant and full of life, but they also attract unwelcome visitors, like pests that can cause damage or disease.
However, you can effectively and organically manage these challenges with the right strategies. This will ensure that your garden stays healthy and productive.
Here’s an organized approach to keep pests away.
Understanding Garden Pests
Familiarize yourself with common garden pests such as aphids, beetles, and caterpillars, which can damage plants by eating leaves, stems, or roots.
Regularly inspect your plants for signs of pests and identify them correctly to manage them effectively.
Encourage natural predators like ladybugs, lacewings, and birds that eat common garden pests.
Plant flowers like marigolds and cosmos to attract ladybugs. And plant yarrow and dill for lacewings.
If pests become a problem, consider using organic sprays like neem oil or insecticidal soap, which control pests without harming beneficial insects or the environment.
Application Tip: Apply these products carefully, following instructions, and preferably in the evening or early morning to minimize the impact on bees and other pollinators.
4. WEED CONTROL
Recognize that weeds compete with your plants for water, light, and nutrients and can quickly get out of control in the summer.
Effective Removal
Remove weeds by hand when the soil is moist, ensuring you get the whole root. Regularly removing weeds before they go to seed can significantly reduce their numbers.
Suppress and Nourish
Use organic mulches like straw, wood chips, or grass clippings to retain soil moisture, add nutrients, and suppress weeds.
Proper Application
Apply a thick layer of mulch around your plants, avoiding direct contact with the stems to prevent rot.
Healthy Soil Helps Build Resistance
Ensure your soil is nutrient-rich and has an excellent structure to make your plants more robust and competitive against weeds.
Companion Planting and Natural Repellents
Plant crops that naturally repel pests, like planting garlic near roses to deter aphids and marigolds to repel other pests.
Regular Monitoring and Early Detection
Regularly inspect your garden to spot problems early, making them easier to control and manage.
Using these organic solutions and preventative measures, you can effectively manage pests and weeds, keeping your summer garden healthy and thriving. Remember, a little effort in prevention and early intervention can save a lot of work later on.
5. SUCCESSION PLANTING DURING SUMMER HARVESTING
Harvest vegetables as they become ripe to encourage further production.
What is succession planting?
Succession planting, or planting new crops as others are harvested, ensures a continuous supply of fresh produce throughout the season.
Harvesting vegetables at the right time is not just about enjoying the freshest produce; it’s also a crucial practice for maintaining the health and productivity of your garden.

Here's a deeper look at why timely harvesting is essential and how it can lead to further production.
Understanding the Life Cycle of Plants
Plants have a natural life cycle, including growing, flowering, and producing fruit or vegetables.
Once the produce is ripe and not harvested, many plants will focus on maturing those fruits or seeds. This is their way of ensuring the next generation.
However, harvesting the ripe vegetables encourages the plant to continue producing more flowers and, subsequently, more fruits or vegetables.
6. Benefits of Regular Harvesting
Encourages Continuous Production
Many vegetable plants, especially those that produce over a long period, like tomatoes, peppers, beans, and squash, will continue to produce more if regularly harvested. By picking the ripe vegetables, you free up the plant's resources to focus on developing more produce.
Maintains Plant Health
Overripe vegetables can attract pests and diseases. Regular harvesting helps keep the plants healthy by reducing the likelihood of problems that can spread to the rest of the plant or other plants in your garden.
Better Taste and Nutrition
Vegetables are at their peak of flavor and nutritional content when they're just ripe. Regular harvesting ensures you're always enjoying the best quality produce from your garden.
7. Summer Harvest Plants
Harvesting in the summer can be one of the most rewarding aspects of gardening, as many plants peak during this season.
Here's a list of common plants that are typically ready for harvest in the summer.
Tomatoes
A staple in many gardens, tomatoes come into their own in summer. They can be harvested when they reach their full color and are slightly soft to the touch.
Peppers
Both sweet and hot varieties mature in summer. They can be picked when firm and have reached their full color, although some hot peppers may be left on the plant to intensify their heat.
Cucumbers
Ideal for salads and pickling, cucumbers should be harvested when they are firm and green before they become too large and seedy.
Zucchini and Summer Squash
These grow quickly and should be harvested when still small and tender for the best flavor and texture.
Eggplant
Harvest eggplants when they are firm and glossy. The skin should spring back when lightly pressed.
Green Beans
Pick these when they are firm and have reached a good size before the seeds inside fully develop.
Corn
Sweet corn is ready when the kernels are plump, releasing a milky juice when punctured. The silk at the top of the ear should be brown and dry.
Berries
Strawberries, blueberries, raspberries, and blackberries all ripen in the summer. They should be picked when fully colored and tender.
Melons
Watermelons, cantaloupes, and honeydews are summer favorites. They're usually ready when they sound hollow when tapped, and the part of the melon touching the ground turns yellow.
Herbs
Many herbs like basil, cilantro, mint, and dill are in full swing during the summer and can be harvested regularly to encourage further growth.
Lettuce and Leafy Greens
While many prefer cooler weather, some varieties of lettuce and greens can be harvested early in summer before the heat causes them to bolt.
Root Crops
Early varieties of vegetables, such as carrots, beets, and potatoes, can often be harvested in summer.
The best time to harvest can vary based on your specific climate, the variety of the plant, and the weather during the growing season.
Regularly check your plants and harvest them for the best flavor and nutritional content when they peak.
8. Tips for a Successful Harvest
Know When to Pick
Learn the signs of ripeness for each type of vegetable you grow. This might include color, size, or firmness.
For example, a tomato might be ripe when fully colored and slightly soft to the touch, while a bean might be ready when it's firm and snaps easily.
Use the Right Tools
Use clean, sharp tools to harvest your vegetables.
This might be as simple as a pair of garden scissors or a small knife.
Clean cuts are better for the plant and can help prevent disease.
Be Gentle
Handle your vegetables gently to avoid bruising them.
Bruised areas can decay quickly and might attract pests or diseases.
Check Regularly
Visit your garden regularly to check for ripe produce.
Some vegetables can go from ripe to overripe quickly in the summer heat.
By understanding the importance of timely harvesting and implementing it in your garden routine, you're gathering food for your table and keeping your garden productive and healthy.
BEST GARDENING TOOLS FOR SUMMER

Garden Hose & Adjustable Nozzle — A durable garden hose with an adjustable nozzle is essential for summer gardening.
It ensures that all plants get the necessary water, especially during hotter and drier periods.

Used for breaking up soil, removing weeds, and aerating soil.

Leaf blowers are useful in the summer and fall.
They are great for clearing debris, grass clippings, and fallen leaves.
HOW TO PREPARE YOUR GARDEN FOR FALL
As the days grow shorter and the temperatures drop, your garden enters a new phase— The Fall Harvest.
It is a time of abundance when many vegetables reach their peak and are ready to be picked.
Preparing for the fall harvest involves knowing which vegetables are ready, understanding how to check for ripeness, and timing your harvest to beat the frost.
1. VEGETABLES READY FOR FALL HARVEST
Many vegetables, like pumpkins, squash, and root vegetables, are ready to be harvested in the fall. Check for ripeness and harvest these crops before the first frost.
Here's a detailed look at how to make the most of this bountiful season.
Pumpkins
A classic symbol of fall, pumpkins are usually ready to harvest when they have reached their expected size, the skin has deepened to its final color, and the rind is hard.
Squash
Both summer and winter squashes can be harvested in the fall. Look for a hard rind and full color. Varieties like butternut, acorn, and spaghetti squash are popular in the fall.
Root Vegetables
Carrots, beets, turnips, and radishes are all ready for harvest in the fall. These vegetables can often withstand light frosts, but it's best to harvest them before the ground freezes.
Leafy Greens
Kale, spinach, and Swiss chard can thrive in cooler weather and are often sweeter after a light frost.
Brussels Sprouts
These are at their best after being kissed by frost, which tends to sweeten their flavor.
Potatoes
Ready when the foliage starts to die back, and the skins are thick.
Onions and Garlic
It's time to harvest when the tops begin to yellow and fall over.
2. Checking for Ripeness
Visual Cues
Many vegetables show their readiness through color changes, size, and other visual cues.
For example, a ripe tomato will be fully colored and slightly soft, while a ripe pepper will have a deep, uniform color.
Texture
The texture of the vegetable can also indicate ripeness.
For instance, a ripe pumpkin or squash will have a hard rind that resists puncture, while a ripe cucumber should be firm and not too soft.
Taste Test
Sometimes, the best way to know if something is ready is to taste it. This is especially true for leafy greens and herbs.
3. Timing Your Harvest
Understand Frost Tolerance
Some crops, like kale and carrots, can tolerate and even benefit from a light frost. Others, like tomatoes and peppers, must be harvested before the frost hits.

Monitor Fall Weather Forecasts
Plan for Storage
Consider how you'll store your harvest. Some vegetables, like squash and potatoes, can be stored for months if kept in the right conditions, while others are best used immediately or preserved through canning or freezing.
Knowing which vegetables are ready and when to pick them can ensure a successful and bountiful harvest.
4. BENEFITS OF PLANTING FALL CROPS
Fall is a great time to plant cool-season crops like kale, broccoli, and Brussels sprouts. These vegetables can tolerate cooler temperatures and even improve in flavor after a light frost.
Here's a closer look at why fall planting is beneficial and how to ensure a successful cool-season harvest.
Extended Growing Season
Planting cool-season crops extends your garden's productivity well into the fall and sometimes early winter, maximizing your garden space and harvest.
Improved Flavor
Many cool-season crops develop a sweeter taste after a light frost. The cold triggers these plants to convert stored starches into sugars, acting as a natural antifreeze and producing a sweeter flavor.
Pest Reduction
Cooler temperatures often mean fewer pests, making managing your fall crops easier and more organic.
5. pOPULAR COOL-SEASON CROPS
Kale
This hardy leafy green can survive temperatures as low as 20°F. The leaves are often sweeter and more tender after a frost.
Broccoli
Ideal for a fall harvest, broccoli planted in late summer or early fall can produce well into the cooler months.
Brussels Sprouts
These take a while to mature, but they're worth the wait. They're one of the best crops for improving flavor after a frost.
Spinach
Fast-growing and frost-tolerant, spinach can often be harvested well into late fall or early winter.
Lettuce
Many lettuce varieties prefer cooler weather and can be harvested until the first hard freeze.
Radishes
Quick to mature, radishes can be planted in the fall for a fast, spicy addition to your autumn salads.
6. TIPS FOR PLANTING FALL CROPS
As autumn approaches, understanding the best planting times, preparing the soil, managing water requirements, and safeguarding your plants are essential.
Consider these elements to ensure your fall garden is ready for a successful harvest.
Check Planting Dates
Timing is the key. Check the maturity dates on your seed packets and count backward from your area's first expected frost date. This will tell you the latest possible planting date for each crop.
Soil Preparation
After a busy summer, your soil might need a boost. Add compost or other organic matter to replenish nutrients and improve soil structure.
Watering Needs
While fall crops generally need less water due to cooler temperatures and increased rainfall, keep the soil consistently moist, especially during seed germination and early growth.
Protection
Be prepared to protect your crops from an unexpected early frost. Floating row covers or cold frames can provide extra warmth and extend your growing season.
Planting fall crops is a beautiful way to keep your garden productive and your kitchen stocked with fresh vegetables well into the cooler months.
Embrace these strategies and look forward to a vibrant and productive fall garden.
BEST GARDENING TOOLS FOR FALL

A leaf rake is essential for gathering fallen leaves and debris from your garden and lawn.
Look for one with a wide, durable head and ergonomic handle to make the work quicker and more comfortable.

Fall is a great time to start or maintain a compost pile with an abundance of leaves and plant debris.
A compost bin or tumbler helps contain the compost and can speed up decomposition.

A bow or pruning saw is essential for cutting through larger branches and woody stems that pruning shears can't handle.
These saws are designed to make quick, clean cuts through thick wood without requiring excessive effort.
HOW TO PREPARE YOUR GARDEN FOR WINTER
As the vibrant colors of fall fade and the first frost touches your garden, it’s time to start preparing for winter.
This season might seem like a time of rest for your garden, but you can do plenty to protect your soil and plants, ensuring they survive the winter and emerge healthy and strong in the spring.
Here’s a structured approach to preparing your garden for the cold months ahead.
1. Protecting Your Soil
Using Cover Crops
Planting cover crops like clover or rye is a fantastic way to protect and enrich your soil over the winter.
They cover the bare soil, preventing erosion from wind and rain, and help fix nitrogen in the soil, improving its fertility for the next growing season.
Benefits of Organic Matter
As these cover crops die in the spring, they can be turned into the soil, adding valuable organic matter.
This improves soil structure, water retention, and nutrient content, creating a better environment for next year’s plants.
Choosing the Right Cover Crop
Different cover crops offer additional benefits.
Legumes like clover add nitrogen to the soil.
Grasses like rye have extensive root systems that prevent erosion and break up compacted soil.
2. Caring for Perennials
Cutting Back
Many perennials benefit from being cut back in the fall. This helps to tidy up the garden and can reduce the likelihood of disease and pest problems over the winter.
Some perennials are best left standing because they provide food for the birds.
Mulching for Protection
Adding a layer of mulch around your perennials can provide extra insulation against freezing temperatures.
Organic mulches like straw, leaves, or wood chips are great choices. They protect the roots from cold and add nutrients to the soil as they break down.
Avoiding Crown Rot
While mulching is beneficial, do not pile it directly against the plant stems or crowns.
This can lead to rot and other problems. Instead, spread the mulch around the plant, leaving a little space around the base.
3. General Winter Prep Tips
Garden Clean-Up
Remove any diseased or pest-infested plant material from your garden.
This helps to reduce the chances of problems reoccurring next year.
Tool Maintenance
Winter is a great time to clean, sharpen, and repair your gardening tools so they’re ready for spring.
Plan for Next Year
While your garden rests, take the time to reflect on what worked and what didn’t.
Start planning for next year’s garden, perhaps considering new plants or changes to your garden layout.
4. Winter Plant Protection
Covering Sensitive Plants
Protect sensitive plants from frost by covering them with burlap or frost cloth.
These materials provide a protective layer against cold and frost while allowing air and moisture to pass through.
Mulching for Insulation
Mulch acts like a blanket for your soil and plant roots, helping to maintain a more consistent soil temperature and protecting roots from extreme temperature fluctuations.
5. Winter Soil HEALTH
Utilizing Fallen Leaves
Leave the fallen leaves on your garden beds as a natural mulch.
They will break down over the winter, adding nutrients and organic matter to the soil.
This recycles a natural resource and provides numerous benefits for your garden’s soil.
Winter garden preparation is about protection, preservation, and planning.
By taking the necessary steps to care for your garden in the winter, you can protect your plants and soil, setting the stage for a thriving and vibrant garden in the spring.
6. PLANNING FOR NEXT YEAR
Winter is the perfect time to reflect on the past season and plan for the next.
Gather with your fellow gardeners to discuss what worked, what didn’t, and what you’d like to try next year.
Consider factors like crop rotation, plant spacing, and companion planting.
Sketching out your garden layout can help you visualize where everything will go and ensure you maximize your space.
Order your seeds.
Seed catalogs and online stores are full of possibilities. Order early, as some popular varieties can sell out quickly.
Which plants thrived? Which ones didn’t do as well? Understand what worked and what didn’t work.
Every garden is a learning experience. Even things that didn’t go as planned provide valuable lessons.
7. Gathering with Fellow Gardeners
Meet with your fellow gardeners to discuss the past season. Everyone’s experience is unique, and you can learn much from each other.
Maybe someone tried a new variety of tomatoes that did exceptionally well or found a natural pest control method that worked wonders.
Use this time to coordinate with others, especially if you’re part of a community garden.
Discuss crop rotation plans, communal tools or resources that might need to be purchased, and any changes or improvements to the garden layout or rules.
Setting Goals

Maybe you want to focus on growing food, trying new or challenging plants, or creating a more beautiful space with flowers and landscaping.
Educating Yourself
Use the winter months to learn more about gardening.
Read books, attend workshops or webinars, and research online. The more you know, the better prepared you'll be.
Organizing Your Resources
Take inventory of your gardening tools and supplies.
Clean and repair tools, restock necessary supplies and list anything new you'll need to buy.
By taking the time during winter to reflect, gather with fellow gardeners, and plan for the next season, you're laying the groundwork for a successful and rewarding garden.
BEST GARDENING TOOLS FOR WINTER

Garden Kneeler and Seat— A garden kneeler and seat can make winter gardening much more comfortable, especially when the ground is cold and hard. Versatile. It can be used as a cushioned pad for kneeling or flipped over and used as a seat.

Greenhouse Heater (App Available)
Crucial for gardeners with a greenhouse.
Maintains a consistent temperature during cold winter months.

It is essential for clearing pathways and areas around your garden beds.
SOURCES
“Get a Jump Start on Gardening: Plan Now for a Season of Success | Illinois Extension | UIUC.” Illinois Extension, https://extension.illinois.edu/blogs/flowers-fruits-and-frass/2023-05-05-get-jump-start-gardening-plan-now-season-success.
“Spring Garden Tasks | Horticulture and Home Pest News.” Horticulture and Home Pest News, https://hortnews.extension.iastate.edu/spring-garden-tasks.
“Preparing Your Garden for Summer.” Penn State Extension | The Pennsylvania State University, https://extension.psu.edu/preparing-your-garden-for-summer.
“Gardening Seasons and Cycles,” https://grownbyyou.com/planning/preparing-for-the-gardening-season/gardening-seasons-and-cycles.

The Impact of Early STEM Exposure on Black and HISPANIC Students

WHAT IS THE Impact of Early stem exposure on Black and HISPANIC Students?
Teachers can create a more inclusive and fair educational landscape for Black and Hispanic students by implementing STEM activities that bridge differences and encourage equality. And by implementing these activities early on.
Early exposure to Science, Technology, Engineering, and Mathematics (STEM) activities lays a strong foundation for students’ interest, engagement, and success in these fields. It provides them with valuable opportunities to explore, experiment, and develop critical skills from a young age.
Early Exposure to Stem Activities
Fosters a love for learning
Enhances cognitive development
Lays the groundwork for future academic and career choices
Stimulates curiosity
Nurtures problem-solving abilities
Cultivates a positive attitude toward STEM disciplines
Early exposure to STEM provides children with age-appropriate opportunities to engage with STEM concepts and activities from an early age.

Black and Hispanic students often face disparities and barriers in accessing quality STEM education. Early exposure to STEM can be a powerful tool in addressing these disparities.
Design STEM projects that incorporate cultural elements and contexts relevant to Black and Hispanic communities. For example:
Exploring traditional agricultural practices
Studying the impact of climate change on marginalized communities
Investigating the contributions of Black and Hispanic scientists and inventors so students can connect STEM learning to their cultural heritage
Role Model Presentations
Invite Black and Hispanic STEM professionals or entrepreneurs from various fields to speak and share their journeys with students.

These role models can inspire and motivate students by demonstrating that individuals from their communities can succeed in STEM careers.
Hearing personal stories and advice can help students envision their own paths in STEM.
STEM Cultural Celebrations
Organize events or workshops that celebrate the contributions of Black and Hispanic scientists, engineers, and mathematicians.
These events can highlight the rich history, achievements, and innovations of these communities, instilling a sense of pride and motivation among students.
Field Trips and STEM Experiences
Arrange field trips to STEM-related institutions, such as museums, research centers, or universities, where students can engage in interactive exhibits.
Visit businesses where students can witness STEM applications in real-world settings.
By targeting these communities with inclusive and culturally responsive initiatives, we can empower Black and Hispanic students to overcome systemic obstacles, build confidence, and envision themselves as capable contributors to the world of STEM.
Encouraging open-ended conversations, incorporating STEM activities into daily life, and exposing children to STEM resources and experiences at home are all effective strategies for promoting early exposure to STEM.
Create a Do-It-Yourself Experiment
Conduct a simple science experiment using household items, such as creating a volcano with baking soda and vinegar or making a homemade lava lamp with baking soda, vinegar, water and food coloring.
Build Structures with Everyday Objects
Use materials like toothpicks and marshmallows or popsicle sticks and clay to build structures and encourage engineering and spatial reasoning skills
Explore Nature

Go on nature walks or have a backyard scavenger hunt to observe and identify plants, insects, and animals.
Discuss their characteristics and habitats.

Measure and Cook
Involve children in measuring ingredients and following recipes while cooking or baking.
This develops math and measurement skills.
Explore Math in Everyday Life
Look for opportunities to engage children in practical math applications, such as calculating discounts while shopping or measuring ingredients for recipes.
Conduct a Family Science Night
Plan a designated evening for the whole family to participate in science experiments, solve puzzles, or watch educational STEM videos together.
Engage in Building and Design Challenges
Encourage children to solve design challenges like building a bridge with straws.
Challenge children to construct a paper airplane that can fly the farthest.
Parents and families play a crucial role in shaping children’s interest and engagement in STEM. By actively participating in their child’s STEM exploration, parents can foster a positive mindset, provide support, and serve as advocates.
INCORPORATING EARLY EXPOSURE IN EARLY CHILDHOOD EDUCATION
Early childhood education serves as a vital starting point for introducing STEM concepts. Educators can nurture curiosity, critical thinking, and problem-solving skills by integrating STEM activities into early childhood curricula.
BUILDING WITH BLOCKS

Building activities with blocks, such as wooden or plastic blocks, help develop spatial awareness, fine motor skills, and basic engineering concepts. Encourage children to experiment with different structures, sizes, and arrangements, promoting creativity and problem-solving.

SENSORY EXPLORATION
Sensory activities allow children to explore different materials and their properties.
For example, using scoops, cups, and funnels, provide children with sensory bins filled with rice, sand, and water to help develop their understanding of volume, texture, and cause and effect.
NATURE WALK AND OBSERVATION
Take children on nature walks or set up a small garden area where they can explore plants, insects, and other natural elements.
Encourage them to observe and ask questions about the environment, fostering their curiosity and understanding of the natural world.
EASY SCIENCE EXPERIMENTS THAT WILL AMAZE KIDS
SIMPLE SCIENCE EXPERIMENTS
Conducting simple science experiments is an excellent way to introduce children to basic scientific concepts.
Activities like mixing coloring with water and food coloring, making baking soda and vinegar volcanoes, or observing the effects of ice melting can help develop their observation, prediction, and critical thinking skills.
CODING WITH UNPLUGGED ACTIVITIES
Introduce coding concepts without screens using unplugged activities.
For example, you can create a coding game where children move through a maze or follow a sequence of arrows to reach a specific destination.
This helps them understand sequencing, problem-solving, and logical thinking.
Remember to adjust the activities based on the age and developmental level of the children, ensuring they are safe and appropriate. The key is to provide hands-on, open-ended experiences that encourage exploration, questioning, and creativity.
Engaging young children in hands-on experiences, such as building structures or exploring nature, cultivates a sense of wonder and ignites their interest in STEM from an early age.
EARLY EXPOSURE IN ELEMENTARY AND MIDDLE SCHOOL
Elementary and middle schools are pivotal in providing early exposure opportunities to students. Schools can create an engaging learning environment through well-designed STEM programs and initiatives that encourage exploration and inquiry.
Implementing hands-on projects, incorporating technology, and integrating STEM activities across various subjects can stimulate interest, creativity, and a deeper understanding of STEM concepts.
Community Partnerships
Collaborate with local community organizations, businesses, or professionals to provide opportunities for Black and Hispanic students. This can involve internships, apprenticeships, or job shadowing that expose students to STEM careers and provide practical experiences and networking opportunities.
By implementing targeted early exposure STEM activities, you can empower Black and Hispanic students to see themselves as valued contributors in the STEM fields, foster their interest and enthusiasm, and promote a more diverse and inclusive STEM community.
COLLABORATIONS WITH COMMUNITY ORGANIZATIONS AND BUSINESSES
Partnerships with community organizations and businesses bring real-world context and expertise into early exposure initiatives.
Local museums, science centers, and tech companies can offer hands-on experiences, mentorship programs, and exposure to diverse STEM careers.
These collaborations broaden students’ horizons, connect their learning to practical applications, and provide valuable role models for aspiring scientists, engineers, and mathematicians.
OVERCOMING BARRIERS AND ENSURING EQUITY IN EARLY EXPOSURE
Ensuring fair access to early exposure opportunities is of utmost importance, and providing equal opportunities to all students is crucial. Addressing financial barriers is a key step toward achieving this goal.
Scholarships, fee waivers, and funding support can help level the playing field.
Additionally, cultivating culturally responsive early exposure initiatives acknowledges and celebrates the unique cultural backgrounds of students, making STEM activities relatable and meaningful for all.
CONCLUSION
Early exposure to STEM activities offers immense benefits for all students, and it holds particular significance for Black and Hispanic students who often face systemic disparities.
Ultimately, the goal is to help students gain the knowledge, desire, confidence, and preparation they need to pursue a career path in science, technology, engineering, and math.

By providing targeted initiatives, engaging parents, integrating STEM in early childhood education, and forming partnerships with community organizations and businesses, we can create a more inclusive and equitable STEM education and workforce landscape for Black and Hispanic students.
SOURCES

15 Benefits of Community Gardening
There are many advantages that communities and residents can receive from community gardens. This article will explore 15 of those benefits.

WHAT IS A COMMUNITY GARDEN?
A community garden is a space set aside for planting trees, produce, herbs, and/or flowers and is cultivated by a communal population, such as a neighborhood, school, church, nursing home, hospital, or other facilities. Plots may be nurtured individually or by the entire group.
There are many advantages that communities and residents can receive from community gardens. This article will explore 15 of those benefits.
TABLE OF CONTENTS
15 Benefits of Community Gardens
Conclusion - Read More About It - Learn More About It - Sources
1. environmental Cleanup
Land once abandoned or used as an unauthorized trash dumping site can gain new life as a place of beauty. Creating a community garden can rid a community of an eyesore. Using land for gardening can reduce stormwater runoff into the streets by improving the land’s water-holding capacity allowing plants to absorb rainwater.
Garden composting can reduce neighborhood waste. And gardening can help restore soil quality. Plants add oxygen to the air and reduce air pollution.
If there is possible soil contamination, a raised bed garden can avoid ground contamination.
Cleaning, Planning, and Creating a Community Garden
BEFORE


2. Fresh, Nutritious Food
A community garden provides inexpensive and fresh produce in a neighborhood where fresh fruit and vegetables may be limited and costly.
Children who learn to grow vegetables are more likely to eat the vegetables they’ve grown, giving way to healthy eating. These kids become more familiar with fresh, healthy foods. They know what different fruits and vegetables taste like and can identify them. They gain knowledge that can last a lifetime.

Neighbors can obtain fresh produce without traveling many miles to a supermarket.
3. Food Security
Many families experience food insecurity and have irregular access to food. They may not know where their next meal is coming from.
More than 34 million people, including 9 million children, experience food insecurity in the United States. — Feeding America
Food insecurity can be a temporary situation or can last a long time. It can be caused by poverty, unemployment, or other reasons. Community gardens can help families have more reliable access to nutritious food and lower household food security concerns by up to 90%. And excess produce from the gardens can be shared with friends and neighbors.

Share of Adults Reporting Household Food Insecurity
Source: Health Reform Monitoring Survey, March to April 2020, April 2021, and June 2022. Urban Institute.
In June of 2022, the percentage of households reporting food insecurity included White households, 17.3 %; Black households, 29.2%; and Hispanic/Latinx households, 32.3%.
A garden within walking distance, especially in an urban area, can help families who do not have a neighborhood retail store that sells fresh produce; and who may not have access to fresh food from a food pantry or food bank.
FOOD BANK

FOOD BANK — Produce from community gardens can also be donated to food banks, then distributed to food pantries and food shelves where even more people can be provided with fresh fruits and vegetables to supplement their diet.
FOOD PANTRY

FOOD PANTRY AT PACIFIC, CALIFORNIA
FOOD PANTRY — Common food pantry items are canned vegetables and meats, tomato products, juice, and baking items.
FOOD SHELF

WHITE BEAR FOOD SHELF, MINNESOTA
FOOD SHELF — Typically offers dry goods, dairy, meats, and fresh produce; set up like a store where neighbors can shop.
4. Social Health and Community Cohesion
When neighborhood residents are welcome to participate and care for a garden, it helps build community cohesion. People become invested in a common goal, and it brings them together. They cultivate, nurture, and harvest the produce from plots that can be shared among gardeners or cared for individually.
A community garden is a welcoming place for all ages and people of all backgrounds. Residents meet and get to know people they may not have taken the time or had the opportunity or inclination to get to know. They have a chance to work side-by-side with neighbors.
A community garden contributes to community bonding, and for older ones who may feel isolated, it offers a chance to be more involved with their neighborhood.
5. Community Meeting and Event Space
A community garden becomes a meeting place where residents can gather and collaborate on different projects. Workshops and classes related to gardening can be held there.
“The seating area can become the heart of the community garden.” — Sari Albornoz, Sustainable Food Center (SFC).
It can be a place where people can share ideas. It can be a place for casual conversations, potlucks, and performances.
A small recreational area for children can be a welcoming bonus for young ones.

Roosevelt Community Garden — Roosevelt, New York
A community garden should have a kiosk or message board, a way to visually communicate meeting times and sign-up information, and days when the garden is open. Signs should be clearly and prominently posted. Should have ample signage where passersby can see how to get involved.


6. LOCAL AND ETHNIC IDENTITY
A community garden is a good place to nurture and preserve the community's cultural identity. It increases a sense of belonging, allowing communities to connect with their heritage.
For example, ancestral practices and cultural food choices are important in expressing and continuing family history.
Though tomatoes, cucumbers, green beans, and peppers may be popular crops to plan, some culturally favorite foods are:
GOJI BERRIES
CHAYOTE OKRA
BOK CHOY
BITTER MELON
COLLARD GREENS
MUSTARDS
GREEN TOMATOES
FAVA BEANS
People who plant and cultivate community gardens also share their diversity and traditions. It’s an important part of cultural identity. It’s part of communication and cultural cohesion. Food is more than nourishment; it represents ethnic identity. And food helps people to maintain their cultural identity.
A garden is a place where people from different cultures can create understanding and respect. A potluck with produce grown in the community garden is a great way for neighbors to share their food traditions and culture.
7. Neighborhood Beautification & Community Pride
Transforming an empty, vacant lot or a trash-filled lot into a community garden can improve the look of a neighborhood. The fragrant scents of a flower garden and the beautiful colors and greenery of vegetables can remake a neighborhood.

BEFORE AND AFTER

An unused lot can be turned into a natural dwelling place for birds and beneficial insects.
Besides improving the look of a neighborhood, a community garden can increase the property values of the surrounding area.
Pride builds when the residents become personally invested in their communities and have a sense of ownership in their community garden. There’s a reduction in litter. And maintenance of nearby homes improves.
8. CRIME REDUCTION
Neighbors engaged in community gardening become better at looking out for one another. As their feelings of empowerment increase, their attitudes and perceptions of the neighborhood improve, as do their crime watch activities.
Cutting overgrown grass, cleaning up broken glass, and removing illegal trash dumping may help curb crime.
According to research by the University of Michigan, communities that repurpose vacant spaces for activities such as gardening experience higher reductions in neighborhood violence and crime than neighborhoods that do not clean and repurpose vacant lots.

Communities can partner with stakeholders, such as businesses or non-profit organizations, so residents are not unintentionally burdened with making land improvements that require funds, supplies, and extensive training.
9. Self-Esteem
The tranquil characteristics of gardening positively affect mental health and self-esteem.
Being able to produce their own food gives individuals an increased sense of competency, accomplishment, and satisfaction. They are creating something of beauty, learning, and being able to teach others and pass along helpful knowledge, which gives gardeners a self-esteem boost.
Gardening allows time to build supportive relationships with others.

Teen gardeners reported feeling relaxed and having feelings of peacefulness. And it helped improve their coping skills and self-esteem.
10. Anxiety and Stress Reduction
Tending a community garden allows one to “slow down” and “connect” with nature and escape daily stresses. Gardening lowers the stress hormone cortisol and increases serotonin and dopamine, which are “feel good” hormones.
Supportive social relationships built through gardening activities can increase individual resilience, decreasing stress and anxiety.

Besides being a worthwhile endeavor, a community garden is a great place to escape and relax. A place where members can join together, commune with nature, and even share in non-gardening activities such as exercise.
11. Physical Health Improvements
Tending a garden encourages regular exercise. The bending, reaching, twisting and pulling weeds that gardeners perform is an aerobic exercise that helps build flexibility, strength, and stamina.
Being outdoors in the sunshine improves exposure to vitamin D, which can increase calcium levels and, in turn, helps bones, joints, and the immune system stay healthy. Especially for older gardeners being outdoors can help them achieve adequate vitamin D levels.
Gardeners should use good judgment and apply sunscreen if needed. Sunglasses and a brimmed hat can provide added protection for skin and eyes.
There are other health benefits. Gardeners eat the produce they grow, increasing their intake of fruits and vegetables.

A diet rich in fruits and vegetables can lower the risk of stroke and heart disease.
A diet rich in fruits and vegetables can:
Lower the risk of digestive problems
Have a positive effect on blood sugar
Can lower blood pressure
Prevent some types of cancer
Lower the risk of eye problems
Help control appetite
12. Environmental Awareness
According to the U.S. Department of Agriculture, 83% of Americans live in urban areas. City living leaves fewer chances for youth and adults to have positive experiences in natural environment elements. Tending a community garden offers a chance to reconnect with the environment.
At 15, Yahir Hernandez signed up for a summer job but got much more than he expected. At Cadillac Urban Gardens in southwest Detroit, he learned to appreciate the environmental aspect of gardening, which focused on the world and on helping the community.
Hernandez enjoyed working with his hands — planting, caring for the plants, and harvesting. The next summer, his responsibilities grew, and he was hired as a supervisor and participated in air quality research.

Yahir Hernandez, 19, started working at Cadillac Urban Gardens on Merritt four summers ago. He’s now a sophomore at Michigan State University. Image credit: Eric Bronson, Michigan Photography
Flowers, vegetable, and herb gardens attract birds, butterflies and other animals to create aesthetically pleasing ecosystems dispersed throughout the neighborhood.
Community gardens allow neighbors and participants to explore the natural environment instead of being locked indoors.
13. Learning Opportunities
The participants in community gardening learn useful skills in food production. They also learn team building as they work together to achieve their individual and community goals.
Soil improvement, recycling, measuring space, philanthropy, pollination, germinating, and saving seeds are lessons learned through gardening and cooperative efforts.
Sarah Clark, a University of Michigan graduate, had the idea of utilizing unused grounds at the former Cadillac Clark Street plant and transforming it into an urban garden that could help the local community.
Besides growing fresh produce for local residents, it’s also a place for area youth to learn and grow.

14. Inter-Generational
As young and old residents participate in the garden, they become involved in the process of learning and growing. Conversations centering on the garden act as an ice breaker as residents get to know one another.
Community gardening provides an opportunity to engage young ones in hands-on training and work experience. Constructive activities end with the consumption of healthy foods they have grown themselves.

Image Credit: Northwest Louisiana Master Gardeners
Besides the skills and knowledge youth gain from gardening, they also develop intergenerational relationships with elder gardeners. These older residents may have learned gardening skills by tending their own home gardens.
Community gardening also engages youth when structured school learning is unavailable during the summer.
Youth can be given specific duties, especially during the summer, keeping them busy and filling their time with positive activities.
Older residents, through life experience, can play an important role in helping young ones start and maintain the garden.
For young people who have never gardened before, older ones can act as instructors and supervisors and give youth direction. Some beginning activities for youth are: clearing lots of trash and weeds, planting, watering, and harvesting.

Tending a garden, youth learn the value of hard work, dedication, responsibility, and delayed gratification. Vegetables and fruit plants must be tended to for months—weeding, watering—before bearing fruit. And children eat the fruit they’ve grown and taste dishes prepared with the vegetables they grow.
They increase their knowledge with life skills that transfer to academic and work environments. They learn appropriate behavior, respect, and language skills.
The youths’ activities may extend to helping the elderly of the community with yard work and keeping the neighborhood’s yards maintained.
Sharing their produce with others will teach them kindness and compassion toward others.
15. Economic Development
Community gardens can help improve the economics of an area.
The closing of factories in inner cities has left abandoned properties, some contaminated. Cleaning the lots, reclaiming them, and using them as vital parts of the community can help improve property values.
Gardeners can sell their harvest at local farmers’ markets and community-supported agriculture programs (CSAs) and make extra income. Individual members can benefit financially by saving money that otherwise would have been spent on groceries. And property owners can generate income by renting out garden space.
Urban agriculture can create jobs and improve the property values of surrounding areas. In addition, they attract other businesses to the area.

A small plot of land can yield large amounts of products giving a high monetary value and significant savings for participating households.
They enable gardeners to sell their produce through a local farmer’s market.
They offer a method to encourage the donation of surplus produce.
Community gardens increase surrounding property values by up to 9.4%.
Every $1 invested in a community garden yields around $6 worth of produce.
There are over 29,000 community gardens in the 100 largest U.S. cities.
Community gardeners eat 37.5% more fruits and vegetables than non-gardeners.
Common reasons for garden participation are access to fresh foods, health benefits, and to enjoy nature.
Women community gardeners are 46% less likely to be overweight than their neighbors.
CONCLUSION
Community gardening can improve your physical and mental health, help you save money on groceries, reduce local crime, beautify your neighborhood, and increase the value of your home.
It’s a great way to become active in your community and get to know your neighbors.
Visit a community garden in your area to find out how you can get involved.
READ MORE ABOUT IT
Available on Amazon


LEARN MORE ABOUT IT
Buying a Vacant Lot in Detroit for $100 and Transforming it into a Community Garden
How Radical Gardeners Took Back New York City
New York City looked a lot different in the 1960s and 1970s. A sharp economic decline and white flight meant there was mass disinvestment and urban decay, particularly in the city’s lower-income neighborhoods. It’s what Hattie Carthan and Liz Christy noticed in their communities when they each set out to revive their neighborhoods by making them greener. Ultimately, their radical acts of gardening would transform the landscape across New York City.

PLANT - GROWING - FACT - SHEETS
SOURCES
“The Many Benefits of Community Gardens – Greenleaf Communities.” Greenleaf Communities, 11 July 2013, https://greenleafcommunities.org/the-many-benefits-of-community-gardens.
Julie Ober Allen MPH, Katherine Alaimo PhD, Doris Elam & Elizabeth Perry (2008) Growing Vegetables and Values: Benefits of Neighborhood-Based Community Gardens for Youth Development and Nutrition, Journal of Hunger & Environmental Nutrition, 3:4, 418-439, DOI: 10.1080/19320240802529169
“Community Gardening: Stress, Well-Being, and Resilience Potentials - PMC.” PubMed Central (PMC), https://www.ncbi.nlm.nih.gov/pmc/articles/PMC7558991/. Accessed 16 Feb. 2023.
Robbins, Ocean. “Community Gardens Are Growing Health, Food, & Opportunity.” Food Revolution Network, https://www.facebook.com/foodrevolutionnetwork, 4 Aug. 2021, https://foodrevolution.org/blog/community-gardens.
“The Many Benefits of Gardening - From the Barclay Blog.” Barclay Friends, 22 June 2020, https://bf.kendal.org/2020/06/22/the-many-benefits-of-gardening.
“Benefits of Community Gardening - Los Angeles Community Garden Council.” Los Angeles Community Garden Council, 16 Feb. 2021, http://lagardencouncil.org/benefits-of-community-gardening/.
Journal of nutrition education and behavior, 2008, Vol.40 (2), p.94-101| ISSN: 1499-4046| EISSN: 1878-2620| DOI: 10.1016/j.jneb.2006.12.003| PMID: 18314085| CODEN: JNUEBX
“Urban Gardens Improve Food Security | University of California.” University of California, 31 May 2016, https://www.universityofcalifornia.edu/news/urban-gardens-improve-food-security.
Oberst, Lindsay. “Food Insecurity Is A Problem for Almost 30 Million Americans.” Food Revolution Network, https://www.facebook.com/foodrevolutionnetwork, 6 Mar. 2017, https://foodrevolution.org/blog/food-and-health/healthy-affordable-food-food-deserts/.
“Full Article: Review and Analysis of the Benefits, Purposes, and Motivations Associated with Community Gardening in the United States.” Taylor & Francis, https://www.tandfonline.com/doi/full/10.1080/10705422.2010.519682. Accessed 16 Feb. 2023.
Hannah, A. K. and Oh, P. 2000. Rethinking urban poverty: A look at community gardens. Bulletin of Science, Technology and Society, 20: 207–216. [Crossref], [Google Scholar]
Carrie Draper & Darcy Freedman (2010) Review and Analysis of the Benefits, Purposes, and Motivations Associated with Community Gardening in the United States, Journal of Community Practice, 18:4, 458-492, DOI: 10.1080/10705422.2010.519682
Saldivar-Tanaka, L. and Krasny, M. 2004. Culturing community development, neighborhood open space, and civic agriculture: The case of Latino community gardens in New York City. Agriculture and Human Values, 21: 399–412. [Crossref], [Web of Science ®], [Google Scholar]
The Child in the Garden: An Evaluative Review of the Benefits of School Gardening https://www.tandfonline.com/doi/abs/10.3200/JOEE.40.2.15-38
Rahm, J. (2002). Emergent learning opportunities in an inner-city youth gardening program. Journal of Research in Science
Teaching, 39, 164–184.
Director, Sari Albornoz, Grow Local Program. “What Makes a Community Garden Thrive? - Sustainable Food Center.” Sustainable Food Center - Austin, Texas - Sustainable Food Center, https://sustainablefoodcenter.org/latest/gardening/what-makes-a-community-garden-thrive. Accessed 16 Feb. 2023.

What is Lifelong Learning?
Lifelong learning is self-motivated and deliberate. It includes formal and informal training. It is the knowledge gained throughout a lifetime that can benefit you mentally, physically, and financially.
Human beings are constantly learning about themselves and the world around them. It’s a lifelong process. Fully embracing lifelong learning yields many positive results. This article will show you how lifelong learning can help you live a more rewarding life.

What is Lifelong Learning?
Lifelong learning is self-motivated and deliberate. It includes formal and informal training. It is the knowledge gained throughout a lifetime that can benefit you mentally, physically, and financially.
Human beings are constantly learning about themselves and the world around them. It’s a lifelong process. Fully embracing lifelong learning yields many positive results. This article will show you how lifelong learning can help you live a more rewarding life.
Lifelong Learning Overview
Lifelong learning can happen inside or outside formal education. It happens in a learning environment such as a classroom or online school course. But it also happens by choice, not by assignment. You can choose what you want to learn about on a personal level. It can be voluntary and informal.
You choose what and when to study. You can base your choices on activities and skills that you want to learn. It’s self-initiated.
You become self-motivated. You deliberately seek out experiences and set goals for yourself.
It’s ongoing. It can be part of a work environment such as corporate training or continuing education dictated by your career.

CLASSROOM LEARNING
Lifetime learning can take place in a college lecture hall, at work as on-the-job training, or while you engage in activities at home.

ON-THE-JOB TRAINING
Personal development results from gaining knowledge and skills that you develop throughout your life. You then use those skills to advance in your job, toward a degree, or personal abilities you use in activities such as gardening.
Continuously learning new skills focuses your mind on personal development as you gain knowledge and skills throughout your life.

HOBBIES & ACTIVITIES: GARDENING
Whatever your age, you’re never too old to learn something new. And it can be rewarding to pass that knowledge down to generations that follow, children and grandchildren.
Learning just for the sake of learning can have its own rewards especially if it’s something you really enjoy. And it can help you understand nature and the world around you.
Benefits of Lifelong Learning
Employability and Promotion
Earn More Money
Improve Economic Opportunities
Gain a New Qualification
Increase Job Success
Increase Competitiveness
Achieve Professional Satisfaction
Increase Employability
Become Invaluable
Improve Leadership Skills
Able to Re-Invent Oneself
Increase Your Options
For Companies — Improve Development, Deployment, and Retention
Self-Improvement
Mental Stimulation
Personal Satisfaction and Fulfillment
Improve Quality of Life
Increase Overall Wellbeing
Be Well-Balanced
Transferable Skills
Become an Expert
Re-Ignite Joy
Develop Adaptability
Have an Open Mind
Increase Creativity
Sharpen Your Mind
Reduce Boredom
Increase Personal Growth
Increase Self-Confidence & Self-Worth
Opens Future Opportunities
Build Valuable Skills
Positive Effects on Emotional and Mental Health
Contribution to the Community and Society
Become an Engaged Citizen
Enhance Social Inclusion
Make Valuable Contributions
Increase Volunteerism
Develop Interpersonal Skills
Expand Local Talent Pool
Positive Impact on Society
Improve Awareness of World Events
Meet New Friends with Common Interests
Feel More Connected to Your Community
Getting motivated

Humans are natural learners and have a natural curiosity. Learning is unavoidable and happens all the time.
As infants, you learned about the world around you. The places, the people, the language. You were constantly learning. And it didn’t stop.
Once you entered school, learning became more formal, more directed. But outside the classroom, you were able to play to your heart’s content, to form friendships, to learn about your likes and dislikes.
You discovered hobbies and games that you enjoyed. You learned about yourself. Learning is unavoidable
Increase your comfort zone.
As you grew older, you began to develop a comfortable way of doing things. And maybe you forgot about the things that used to bring you joy. After all, with bills to pay, a job to go to, and a family to take care of, it’s natural to get into a particular groove, a routine that makes it easier for you to accomplish your daily list of responsibilities.
Your comfort zone is your happy place.
Comfort zones minimize the stress, risk, and anxiety you feel when trying something new. It’s the routine habits you engage in throughout the day. From your favorite cup of coffee in the morning to your bedtime routine.
But stepping out of your comfort zone may be just the thing you need. It only takes motivation. And challenging yourself can have marvelous results.
27 Ways to Motivate Yourself


When you start setting deadlines and expectations in order to reach goals, it may encourage you to change your routines and increase productivity. Urgency and uneasiness can be motivating.
Staying in your comfort zone makes it easier for you to avoid doing something new. But each time you step out of your comfort zone, it gets easier.
Start small with just a tiny change in routine. Something new on the breakfast or dinner menu, a different route to work, a different genre of music.
Breaking out of your comfort zone can take courage. So it’s okay to go slow, one small step at a time. Once you start, momentum will push you forward.
New experiences allow you to learn new skills and cultivate new ideas that inspire and educate.
You can stretch your personal boundaries by connecting to people you admire and who inspire you. By traveling near or far. Push yourself beyond your normal limits.
Make small steps, not to stress yourself out, but to see what you are capable of. A project that seems too big may cause you to procrastinate and put it off for a later day or time.

DO WHAT YOU LOVE
Look for activities that motivate you. Is there something you’ve been putting off? Something that you know you’d enjoy doing? Something you’d enjoy doing even if there was no chance you’d get paid for doing it?
Do you lose track of time when you engage in some activities? That may be a sign you’ve found something that motivates you.
Learn to recognize your personal interests and goals.
Why not take a moment and look for some of that forgotten joy. You are a lifelong learner. Reading a book, watching the news, researching a new vacation spot.
You pick up on new ideas and start to think about learning some of the things you’ve been putting off; learning which Apps you should download; searching the internet for a new recipe. Or reconnecting with a friend or family member on Facebook.
And in this age and time, learning how to Zoom or take that meeting or getting the kids connected (or more likely having the kids show you how to get connected) is important.
If you’re working lots of hours, you may feel like there’s no extra time to learn about the trip you want to take or the DIY project on your to-do list.
Motivation causes you to take action.
You don’t have to look far to find your passion. It’s the thing you think about all the time. The thing you can’t shut up about when talking to your family or friends. Whether it’s a new food you discovered or an engine you’re rebuilding, or sports, an activity, or exercise routine. Identify those hobbies or projects.
There are probably already many things you enjoy doing. Don’t ignore them.
Goal-setting
Challenge yourself with specific goals.
Base goals on your current stage of life and/or career. What type of information do you need? Make a list of the things you’d like to learn or be able to do. Then prioritize.
Set aside time for learning.
Make a commitment to incorporate lifelong learning into your life. Be able to adapt and evolve. Use a combination of methods. Have a positive attitude toward learning. If you’re trying out new activities and it doesn’t work out or you find you’re not as interested in it as you thought you would be, it’s okay to pivot and change. See yourself as a work in progress.
Have a positive attitude toward learning. Set a goal. And make the time.
What are smart goals?
Goals need to be specific. Just saying that you want to do “more” is not enough. That’s too vague. You have to be able to track your goals and quantify them so that you’ll know if and when you’ve achieved success.

SMART is a goal-setting system that provides structure and allows you to properly focus on your goals and actually attain them. There are five elements. Goals must be specific, measurable, attainable, relevant, and time-bound.
SMART Goals are:
SPECIFIC - Clear, Precise
MEASURABLE - Trackable
ATTAINABLE - Simple, Realistic
RELEVANT - Appropriate, Beneficial
TIME-BOUND - Deadline
Being able to track your goals is a great way to stay motivated. And making plans gives you time to think about your strengths and interests and to build upon them.

SMART GOALS WORKSHEET
What are the things you like about your job? What makes your career or job meaningful to you? Is it the people you interact with? Are you a people person? Or is it the detailed work you enjoy, the steady routines, designing tasks?
Make plans that help build upon your strengths and interests. Clearer goals equal greater success.
The process can be simple. No need to overcomplicate it. Having clear goals allows you to move forward with less distraction, make progress and reach your desired destination. That’s why goal setting is important.
Free Online Classes
What Is a MOOC?
With just a computer and Internet connection, students can access high-quality educational courses without paying tuition or committing to a college program.
A MOOC or massive open online course provides educational lessons to any person, any age, at any time. There is no limit on the number of people who can enroll, and many sites are absolutely free.
Millions of people have enrolled in MOOCs. They are a flexible way to learn job skills, prepare for college, or gain lifelong learning skills.
Following is a list of free courses available online:
Coursera — Provides online learning to individuals and organizations through partnerships with more than 200 universities and companies.
Open Culture Online Courses — Delivers free high-quality educational programming for students worldwide. Open Culture seeks to centralize available content so that learners can find educational resources in one central location. Content includes 1,700 free university courses and over 1,000 free audiobooks.
Alison — Free education that has served over 20 million learners in 195 countries since 2007. Alison believes that education and skills training can change lives. Available courses include academics, personal development, language skills, and business. Lessons are free, but certificates and diplomas are available to graduates for a fee.
Netflix Education Documentaries — A selection of documentary features and series are available on Netflix’s YouTube channel. (Educators and parents should review ratings in order to make informed choices.) Netflix Educational Resources for Teachers — Supplemental discussion questions designed to help engage students.
Udemy Free Courses — Udemy’s mission is to improve lives through learning. These free courses are designed to help learners improve their lives whether they are seeking a new career or a passion for lifelong learning.
TEDEd — TED believes that ideas can change the world. In 2012 it launched TEDEd in order to support teachers and ignite curiosity in students around the world.
Memrise — The fastest way to learn a language.

National Geographic Kids — Free online education for young children. The site provides child-friendly courses, games, videos, and photos that educate and entertain young learners.
Funbrain — Free online educational games and puzzles that help children remain enthusiastic about learning. Funbrain focuses on grades kindergarten through eighth and provides hundreds of lessons that help children develop reading, literacy, math, and problem-solving skills.
Khan Academy — Helps learners from K-12 to adults. Students can study at their own pace and master skills while gaining a strong foundation in math, science, history, and many other subjects. Khan Academy also provides standardized test preparations for SAT and LSAT.
Codecademy — Learn computer coding. Codeacademy uses interactive lessons to teach students how to code. The training techniques are engaging and flexible. Students are enabled to learn and grow and create meaningful technology that can impact the world.
Lifelong Learning activities
Whether you are looking for new lifelong learning skills or wanting to revisit old projects, why not start today!
Look over these 70 Activities to Explore. Note the ones you find interesting and set aside time to learn more about them.
There’s a free download available. Print it and check off the items that interest you.

ACTIVITIES TO EXPLORE ONLINE
The 70 Activities to Explore list gives you a lot of items to consider. Here are some of the websites and videos you can use to begin your journey.
GAMES
CRAFTS
ACTIVITIES
EDUCATIONAL
Motley Fool: How to Invest — Online Investment Guide
Investments for Beginners — NerdWallet’s Online Guide
Lilly Singh’S
HOW TO make A VISION BOARD
Visit these web pages for more insight on how to create a vision board and why you need one:
CLARK KEGLEY’S
HOW TO MAKE A VISION BOARD (COMPUTER METHOD)
HOBBIES THAT MAKE MONEY
If you have an interest that you love, why not get paid to do what you love? Why not turn that hobby into a business.
It won’t be easy. It will take time to learn the business angle of the hobby you love and are skilled at doing. But your hard work and determination will pay off.
Do you have many hobbies and you’re not sure which hobby is that best to take on as a business? Not sure if the one hobby you love is the right one?
Here are some ideas that may inspire you and help you choose the best business concept so you can start getting paid for doing what you love.
10 Money-Making Hobbies to Consider
If you have a green thumb and enjoy working outdoors, why not put your hobby to work? Start with your local area. Many people don’t have time for yard work but want their lawns to look great.
If you like to draw for fun, try your hand at selling your creations online.
Printables and worksheets are easy to make and inexpensive. There are many types to choose from — calendars, checklists, coloring pages, and more. You make it and the customer merely has to download and print it.
Many people are too busy to make a homemade meal. But a great cook or experienced chef can use this opportunity to make money and help families get a great, homecooked meal. It’s also an excellent chance for an enterprising person to teach others to cook.
Many businesses need websites but don’t have the time or know-how to get them done. If you’re creative and have the technical skills or are willing to learn, this may be an excellent business for you. You can create websites for yourself or others.
Photographers are needed to capture the moment — family portraits, grad or wedding photos, and many other special occasions.
Many people enjoy sending and receiving beautiful greeting cards. If you have the ability and craftiness along with writing skills, you may want to try this business niche.
For most businesses just having a website is not enough to draw customers in. It takes coordinated efforts with mediums such as Facebook, Instagram, Pinterest, and YouTube. The list goes on. If you are interested in filling that position, you could be in high demand.
Do you have carpentry skills and enjoy creating beautiful pieces? Do you find building furniture fun and relaxing? Do people see your beautiful creations and ask if they’re for sale? Then you may want to think about turning your hobby into this money-making adventure.
Platforms and websites are available that will help you generate a design, then give you an online marketplace where you can sell your designs. Not just shirts, but caps, backpacks, mugs, cell phone cases, and more.
Hard work paid off for Benny Hsu (pronounced Shoe). Read his success story: How I Profited $100,000 on Teespring in Just 5 Months.
40 Top Hobbies That Make Money — Website
50 Money-Making Crafts You Can Easily Do At Home — Website
48 Side Hustle Ideas to Get You Started by Chris Guillebeau — Free eBook
19 Surprising Hobbies That Make Money Fast — Website
99 Side Hustle Business Ideas You Can Start Today — Free Guidebook
HOW TO START A Business: CANDLE-Making
If you want to turn your hobby into a part-time or full-time business, there are many steps you need to take to get there. Everyone who has started a successful business has a different story to tell.
Your story will be unique. Yet many of the steps will be familiar and time-honored. No matter the business you choose, you will have to go from idea to plan to fruition. You will need supplies. You will have to budget and consider sales and marketing.
Even if you can not see yourself as a candle or jewelry maker, there are still lessons to be learned from these business models that can help you in whatever business you choose to pursue.
Learn from the following examples and let them motivate you as you start your business adventure.
SUCCESS STORY: BRANDON BECHTEL
Brandon Bechtel’s Website: BrandonsCandles.com
HOW MUCH DOES A CANDLE BUSINESS COST? — Free Budget Spreadsheet by Tiana Coates
Start a Candle Business by Tiana Coates — Free Guidebook
Tiana Coates’s Website: WindingWick.com
Candle Making – A Guide For Beginners by Angela Willis — Free Guide
The Complete Guide to Candle Making with Soy Wax and Essential Oils by Anna Sakawsky — Free Guide
Candle Making Business Hacks by Sandra Taylor — Free eBook
How To Start A Candle Business: The 84 Candle Rule — Website
Candle Science: Starting Your Own Candle Making Business — Website
HOW TO START A BUSINESS: JEWELRY MAKING
After watching the video How to Start a Jewelry Business, take a look at the jewelry business guide on Shopify — How to Start a Jewelry Making Business: The Ultimate Guide by Dayna Winter.
Her example and others help explain the path from hobby to business; a venture that could provide extra cash and eventually a full-time wage if that is your goal.
Consider your investment costs, financial as well as time. Start small, until you have a better idea of the details involved.
Lifelong learning is rewarding.
Or you may want to keep your hobby as something you do just for you, for fun and relaxation. Either way, it is part of lifelong learning. You are never too old to take up a new hobby or to learn something new.
Explore the free courses available online, anywhere, any time, at your convenience — right from home. Explore a new activity or delve deeper into a current project.
Lifelong learning is not a destination. It’s a journey. Enjoy!
READ more ABOUT IT



learn more ABOUT IT
50 Free Online Resources for Self-Motivated Learners, By Adnan Manzoor
How To Start A Candle Business + How Much It Really Costs by Kyonne Smith
STEP BY STEP: How I Make My Soy Candles For My Business
What I Wish I Knew Before I Started My Candle Business
MAKE CANDLES WITH ME (Podcast Style) Ep. #1 Preparing For The Grand Opening Of My Own Website!

A Fun, Easy Way to Learn to Draw in One Month or Less